After a neighbour donated a pile of duvet covers so I could make more washable drawstring bags for frontline workers. I was keen to use every last bit of them. Once bags are cut out, there’s actually very little fabric left. These tiny pieces get cut into strips and stashed ready to make raggy wreaths. Of course I cut the buttons off too.
I’d seen that some frontline workers are wearing ear savers/mask mates. I don’t really know what you call them? They are a little strip of fabric with two buttons worn at the back of the head. Instead of hooking the mask elastic around your ears, which is causing soreness, the elastic hooks around the buttons. After a quick poll of NHS friends, all said yes, they are useful, and yes, they would like some. My duvet cover buttons were the perfect size so I set about making some. There are stitched versions but I reckoned crochet would be quickest for me.
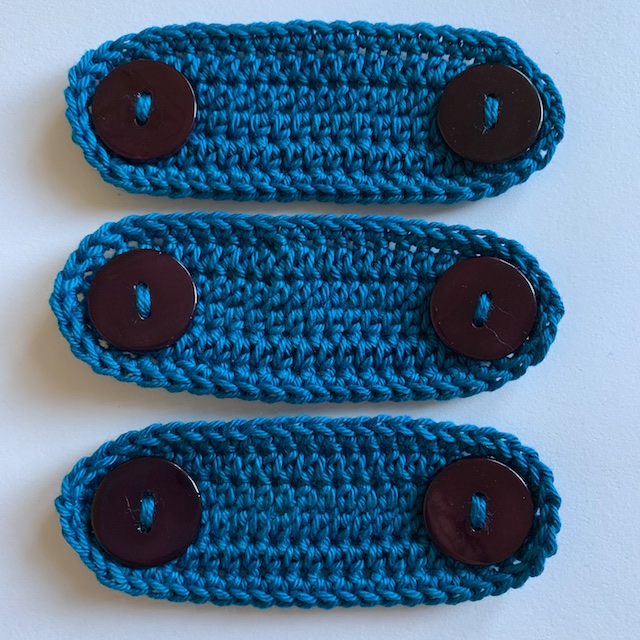
The ear savers I’ve seen vary a bit in length from a couple of inches up to six. Your button size and positioning will make a slight difference to the fit. Masks can be different styles too, as well as heads and ears! Ideally, you’d have the person and the mask there to fit to. Obviously, we can’t do that so I plumped for a measurement somewhere in the middle that works with the yarn and buttons I had. These are about 10cm/4 inches.
I’ve written down my instructions if you’d like to make some too. You can easily tweak it to suit your yarn/hook/tension/mask/buttons/head!
How To Crochet Ear Savers
Requirements (makes three with approx. 2g to spare)
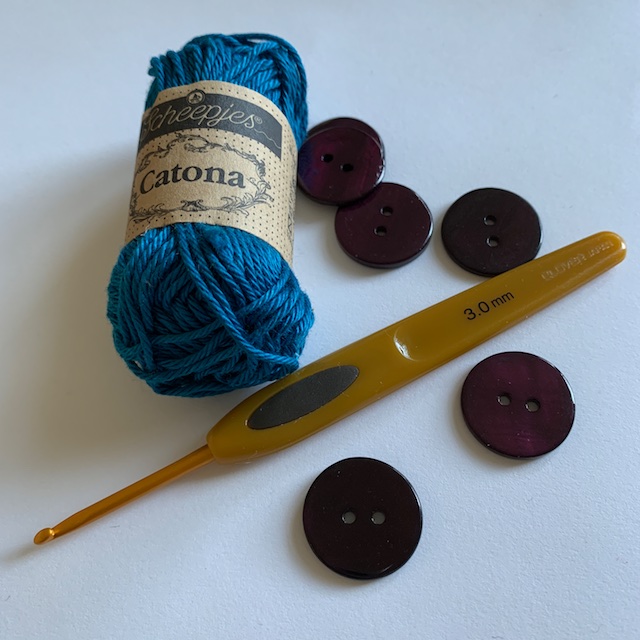
- 10g 4ply/fingering weight cotton yarn. I used Scheepjes Catona. Officially the band says washable at 40 degrees but we’re using our stashes and I’ve tested the ear savers at 60. They are fine.
- 3mm crochet hook.
- 3 pairs of 15-25mm buttons that will withstand hot wash (duvet buttons will be fine).
- Darning needle (check it will fit through your button holes!).
Gauge/Tension
Not critical for this project
Measurements
10cm x 4cm (4.5″ x 1.5″) approx.
Abbreviations (all terms UK)
st stitch
ch chain
dc double crochet
htr half treble crochet
ss slip stitch
Notes
Ch at beginning of round counts as st throughout.
Instructions
Make your slip knot leaving a 20cm/8″ tail and ch20.
Round 1
2htr in 3rd ch from hook (counts as 3htr), 16htr, 5htr in last ch, (do not turn but work into the opposite side of starting ch – see fig.1) 16htr, 2htr into base of next st (which already has the 3htr in – see fig.2), ss into top of ch3. [42htr]

")

")
Round 2
Ch2, 2htr in next st, 18htr, 2htr in next st, 1htr in next (end) st, 2htr in next st, 18htr, 2htr in next st, ss to top of ch. [46htr]
Round 3
Ch1, dc in next st, 2dc in next st, 18dc, 2dc in next st, dc in next st, 2dc in next st, dc in next st, 2dc in next st, 18dc, 2dc in next st, dc in next st, dc in st at base of ch1, ss to top of ch. [52dc]
Fasten off leaving a 20cm/8″ tail
To Make Up
Sew on your buttons at either end using your yarn tails. You’ll need to weave your fastened off end to the right point. Make sure that your buttons are really well secured. They need to survive lots of washing and the last thing you want is for them to ping off in a hospital. Changing direction lots of times when you’re weaving your ends in will help secure them.


Tweaks
Should you want to change the amount of stitches in the starting chain, just make sure on Round 1 that your 5htr goes in the last chain. In Round 2 you need one htr in the ends with 2htr either side. At the ends of Round 3 there’s 2htr in the end with one htr then 2htr either side. If your yarn is thicker, simply finish after round 2.
It took less than an hour to do three at a very leisurely pace. They’re such simple things we can do from home to help out our frontline workers. My first batch have gone off to mental health service professionals. I’ve used up all my buttons for now but I can still be hooking more ready for when I source the next lot.


One thought on “Crochet Ear Saver Tutorial”