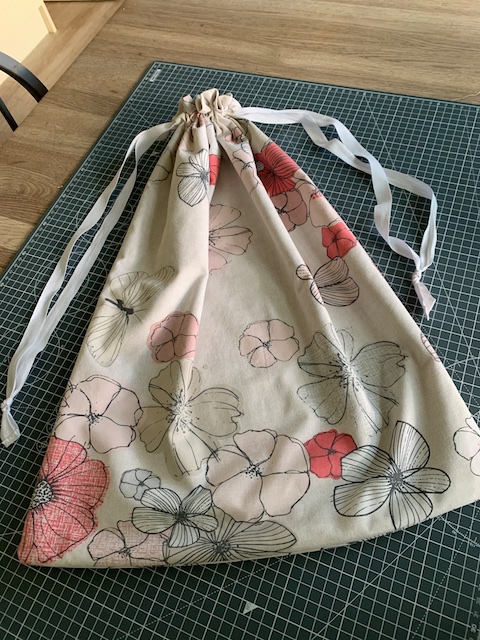
This last week, I’ve been busy making almost thirty fabric bags for frontline workers who need to safely bring their uniforms home to wash. The ties are loosened, scrubs tipped out in the machine and the bag gets washed at the same time.
There’s lots of ways to make drawstring bags but some patterns seem overly complicated, or require you to have an overlocker or make buttonholes. My method might not be the quickest* but it is very simple and can be achieved on the most basic sewing machine. The bags are lined, which does use more fabric, but I find this the easiest way to create a neat drawstring channel. Do consider your fabric choice if you’re making for keyworkers. It will need to withstand hot washing and thick layers will take a long time to dry.
*If you are a confident sewer and want to produce scrubs, bags or other much needed items in bulk for the NHS, check out the Facebook Group For The Love of Scrubs. Here you’ll find patterns and specifics of what’s needed in your area.
Making a Drawstring Bag
Requirements
- Sewing machine
- Iron
- Quality sewing thread. I use Gutermann Sew All. A matching/contrasting colour is nice but not essential!
- Decent scissors and tape measure, or rotary cutter and cutting mat.
- Pins
- Drawstring. You can use cotton tape, cord, or make your own from bias binding or fabric strips (instructions at the end for this). You’ll need around 2.5m for a bag 40 x 60cm.
- Polycotton or lightweight cotton fabric.
- Safety pin.
Notes
- Seam allowances are 1.5cm unless stated otherwise.
- Reverse a few stitches to secure every time you stop and start.
- Secure and trim threads as you go to prevent tangles.
Instructions
- Wash, iron and cut your fabric. You need two main pieces plus two lining pieces identical in size. Accurate cutting will make the next steps so much easier! An A2 piece of paper is ideal to use as a pattern. Otherwise your rectangles should be a minimum of 40 x 60cm (or 50 x 50cm). Place the main fabric right sides together and pin along the two long sides and the bottom edge. If your fabric has a design, make sure the top is at the top! Repeat for the lining.

2. On the main fabric mark at 4cm and 8cm down from the top of each long side. (Marks won’t show so don’t worry about your pen). Sew from the top down to 4cm. Leave a gap then continue sewing from the 8cm mark, stopping 1.5cm from the bag bottom with your needle down. Pivot and sew across the short bottom edge. Stop 1.5cm from end, pivot and sew up the other long side to the 8cm mark. Leave a gap and sew from the 4cm mark up all the way up to the top.

3. Sew around three sides of the lining in the same way but without the 4cm gaps. It’s optional, but if your fabric is prone to fraying, you could trim the seams with pinking shears. Alternatively secure them with a zig zag or overlock stitch. Don’t stitch the layers together though, or you won’t be able to thread your cord!

4. Open up your seams and press.

5. Turn the lining the right way around and drop it inside the main fabric. The right sides of your main and lining fabric should be facing each other. (The wrong side of your main fabric will still be facing out.) Line up side seams and raw edges. Pin together at the seams. Pin again at the halfway points then pin all the way around. This bit is important to stop the layers shifting, so don’t skimp on your pins!

6. If your machine has an extension table, take it off now. Stitch around the top edge, removing pins as you go. Leave a gap of about 15cm for turning the bag through (it doesn’t really matter where you start from).

7. Turn the bag through the 15cm gap so that the right sides are showing. It should look like this.

8. Push the lining down so it sits inside the main fabric. Roll the top seam between your fingers to push the stitch line to the top (I can never get this technique right but find a knitting needle pushed through the gap helps). At the 15cm gap, tuck the raw edges under so they are level.

9. Press so the lining sits a millimetre or so below the main fabric. Pin the gap

10. You’ll now make three parallel lines of topstitching all the way around the top of the bag. Make the first 5mm from the top edge. Then to create your drawstring channel, stitch two further lines all the way around, level with the top and bottom of your gaps. To keep your lines straight, use the edge of your foot or stick a bit of masking/washi tape on your machine as a guide. Reverse back and forward a few times when you get to the side gaps to reinforce.


11. Measure the width of your bag. You’ll need two pieces of drawstring, approx. twice the bag width plus 30cm. I folded the raw edges of my cotton tape over twice and stitched to make them more durable. Alternatively, you could add a little Fraycheck if you have some. If using cord, you can use a flame to carefully heat seal it. There’s instructions at the end for how to make your own drawstring.

12. Attach a big safety pin to the end of your first drawstring and feed it through one hole all the way around the channel, until it emerges through the same hole. Admittedly, this is tedious! Attaching your safety pin to a bodkin, if you have one, makes it so much quicker. Repeat with the second drawstring, inserting it from the opposite side


Knot the ends together and ta-dah, you’re done!


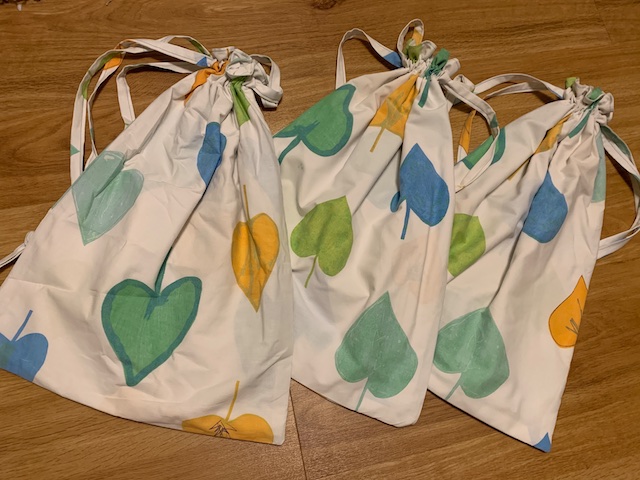
We’re all using what we have available at the moment and spare bedding is ideal. A single duvet cover makes at least four bags with enough fabric leftover to create drawstring ties. (I wasn’t quite sure which way was up on this one!)
To make your own ties, cut two strips of fabric, 6-8cm wide and twice bag width plus 30cm long. (Folding the fabric and using a rotary cutter makes this easy of you have one.) Fold the short ends in about 1cm and press. Fold strips in half lengthways and press. Open out and turn the raw edges in towards the centre foldline and press (avoid overlapping the edges). Fold the strip in half so the raw edges are enclosed, press and stitch across one short end, down the strip close to the edge where the two folds meet and across the other short end.
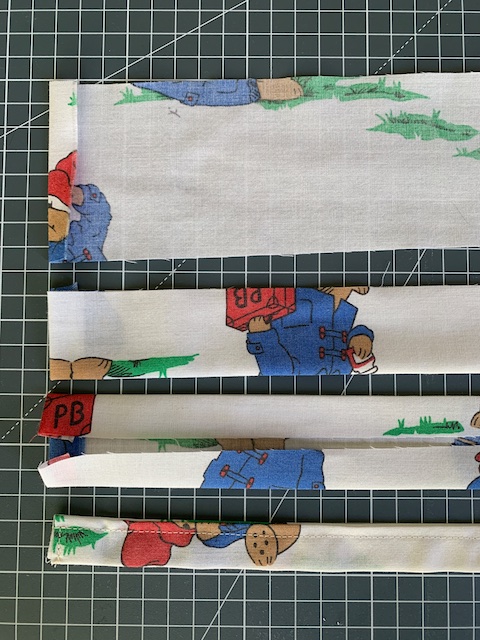
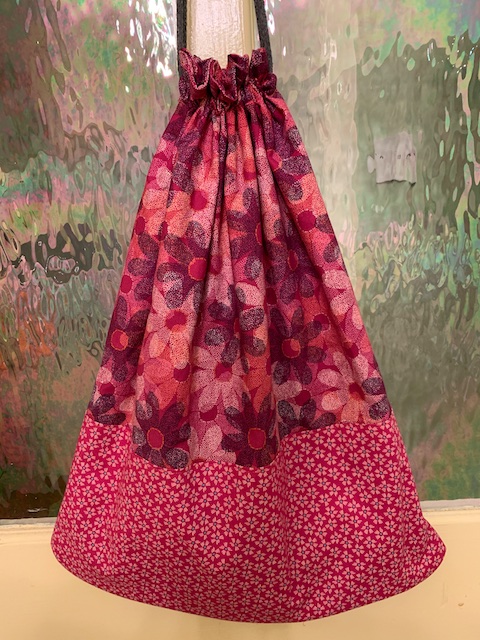
You can easily change the size of the bags. I use the same method to make little gift bags, boxing off the corners if they need a flat base. There was a little of this Paddington fabric left – just enough to make a gift bag for a big jar of my homemade marmalade.

A back-to-school kit bag would be a great project for the kids to keep busy too. I used to make them for my girls, cutting up school summer dresses they’d grown out of. If you don’t have big pieces of fabric, you can mix and match, stitching smaller ones together.
Be sure to keep any buttons you cut off the old duvet covers. They’re perfect for what’s coming up in the next post!

Lovely clear instructions and photos. Point 12 should mention the other drawstring using the other gap.
LikeLiked by 1 person
Thank you so much. I’ve updated point 12. That’s what happens when you’re still writing when you should be in bed!
LikeLiked by 1 person
It’s a really good tutorial so I didn’t want to just leave it ❤️
LikeLike