Following on from my previous post, A Spine Tingle, I’ve written some beginner-friendly instructions explaining how to make the stitch used in my needlepoint cushion.

Firstly, choice of needlepoint canvas is pretty important. What you’re after is a good quality interlocking mono canvas mesh. That’s not as complicated as it sounds! It’s just two thin lengthwise threads twisted around a single crosswise thread. This locks them into place for a good stable open structure to pass your yarn through without distorting your stitches or fraying your yarn.
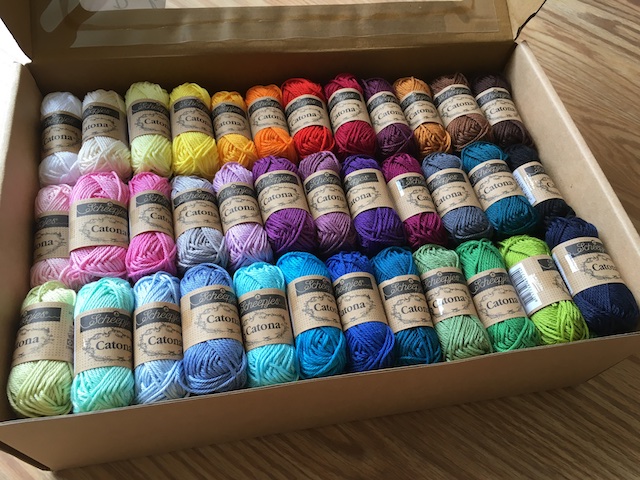
To get the best coverage, you need the right ‘count’ canvas. Count simply means the number of holes per inch (hpi). For my cushion and sample I used Scheepjes Cahlista. Cahlista is Aran weight and I used this 14hpi canvas. You can also buy different sizes of interlocking canvas here.
The thinner your yarn, the higher the count you would need. For example, if you were using fingering weight yarn like the Catona, you might try 18hpi. You could have great fun designing your own needlepoint with one of the delicious Cahlista or Catona colour packs which has a miniature ball of every colour!
A rolling tapestry hand frame kept the canvas taut for my cushion front. For a small piece like this sample, which you could make into a pin cushion, an embroidery hoop is just fine. Once the mesh is secured in the hoop, trim the excess so the yarn doesn’t catch on it. You’re now ready to start stitching!
Decide which order you will stitch your blocks in. I stitched in rows right to left and top to bottom from the top right hand corner. I’m left-handed but you may feel more comfortable going the opposite way. It really doesn’t matter.
Thread a tapestry needle with a piece of yarn the length of your outstretched fingers to shoulder. Your needle will have a blunt end and should be slim enough to pass through the hole smoothly when threaded. (If like me you are 40+, needle threading is probably the trickiest part of this whole thing! One of these makes life much easier.) Your cut length will be enough to stitch one block. Don’t be tempted to stitch more than one block with your length of yarn. It will fray!
You will be making a waste knot which is a temporary way of securing your yarn until your following stitches secure it permanently (Spruce Crafts explain waste knots really well and are a great site for needlepoint tips in general).
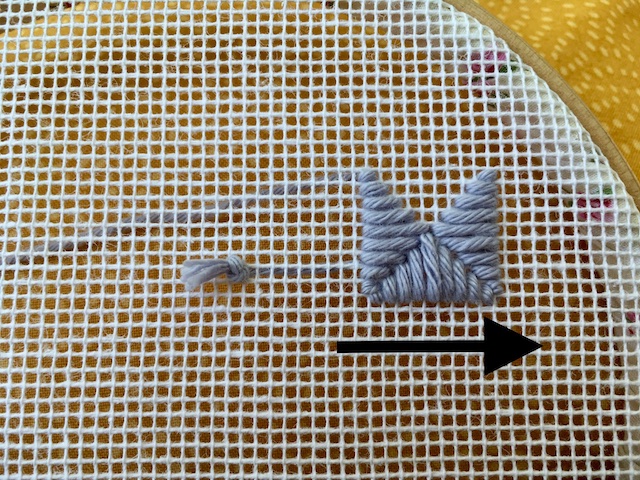
Knot the end of your yarn and push it through your canvas from top to bottom about 8cm away from where your first proper stitch will be, making sure it’s in a position where the yarn at the back will be eventually covered. I put mine on a slight diagonal for extra security.

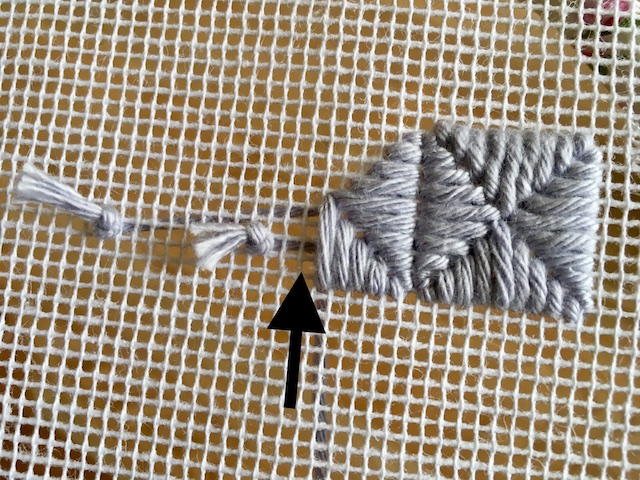
Your first straight stitch will go over one thread, below that your second passes over two etc until you have five horizontal stitches making a right-angled triangle. Make sure to keep your stitches in the same direction. Mine went left to right as the arrow shows.
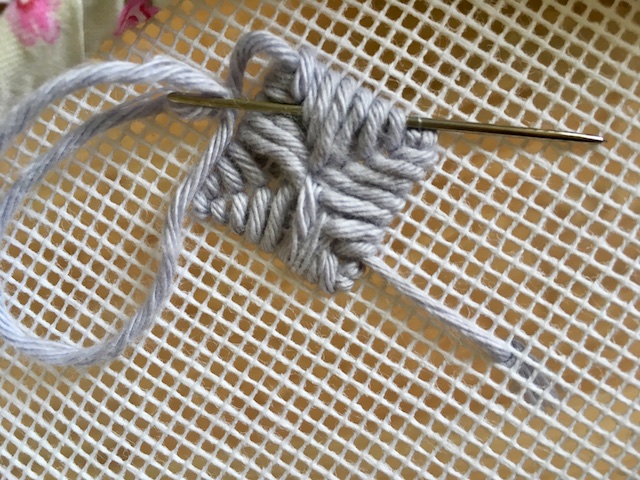
Now you will make four more horizontal stitches that will create (had to think back to GCSE maths here!) an isosceles triangle. Every now and again, let your needle hang loose under your work to unwind. This will help to keep your stitches smooth and neat.

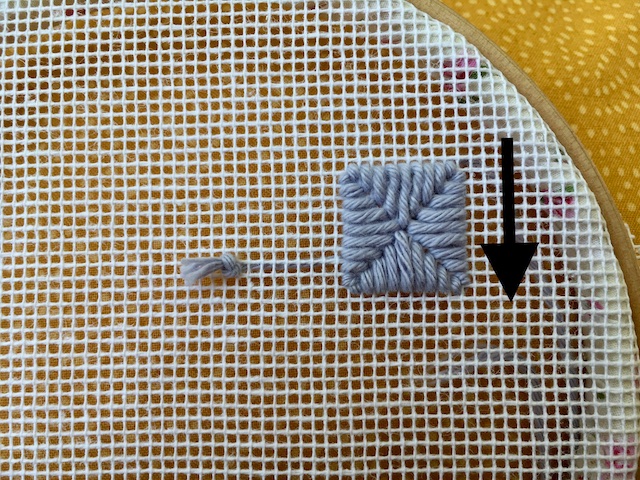
Make a second triangle under and at right angles to the first. Note that the bottom right hole of the square is NOT used.
You’ll now have a bigger triangle and will have stitched over some of the yarn leading from the waste knot. Don’t cut it just yet!

Make a third triangle in the same way. Again the bottom left hole is not used.
The last triangle completes the block, which is a square with indented corners.
Take your yarn to the back of the work and weave it under some of your threads to secure, then trim.
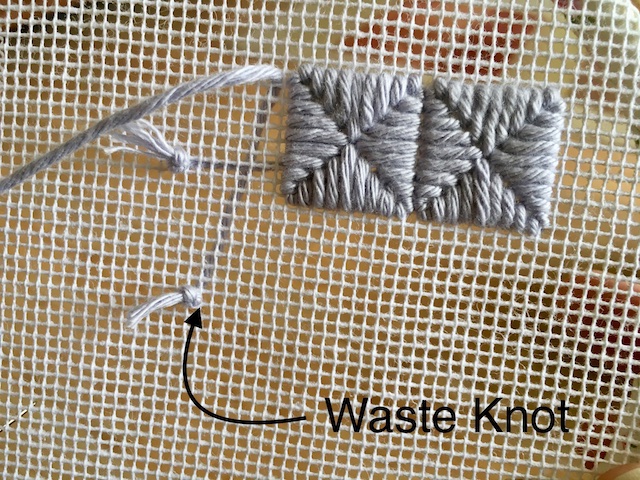
Thread up another length of yarn and make a waste knot about two blocks distance from the first.

Begin your second block with horizontal stitches mirroring the triangle adjacent to it.

Continue as with the first block. When you get close to your first waste knot, you can snip it off. Be very careful not to snip the canvas threads!
When you begin the last block of the row, you will make your waste knot underneath, rather than to the side of the block so that it will be secured by the stitching on the next row.
Complete the second row in the same way as the first. Note the starting point is the row below the bottom of your first row to keep those indented corners.

When you come to the final triangle of this block, you will be stitching towards the centre of the square as before but coming out of a hole that is already stitched in. There is less space to pass you needle through so take care to use the space and not to split the stitch above.

Complete row three in the same way as row two. When you come to your final square, the waste knot yarn will only be covered by the stitches of that block so take extra care to make sure it is well secured before cutting off. I wove through it at the back a couple of times while I stitched the last block.
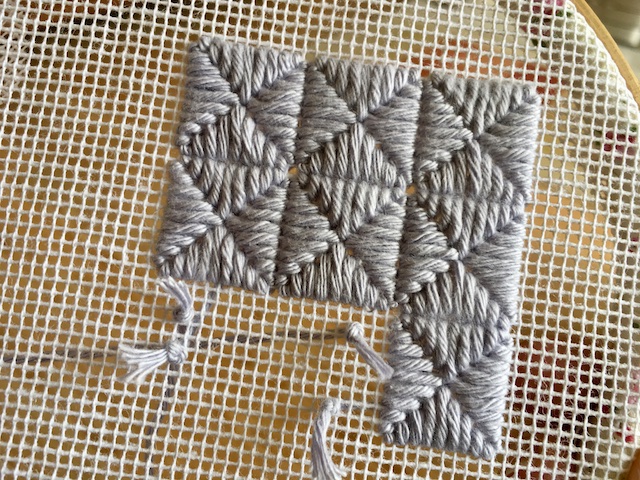
You will now have a 3×3 square. Note the holes at the corners of each. These are the spaces your contrast yarn will pop through

Rather than doing a waste knot for the contrast yarn, I wove under some of the existing stitches. I started at the edges and made diagonal stitches in the direction of the arrows. The space you are looking to put your needle down is where the horizontal and vertical stitches that go over three threads meet.
I completed the stitches around the edge then used a new length for the crosses in the middle. You will need to make four individual stitches here rather than using a cross stitch. For that geometric clean look, this will keep them nice and neat.
So that’s all there is to it. Once you’ve got the hang of it you can probably complete each little square block in 5-10 minutes. You’re sewing in ends as you go along and as the canvas is sized, you can safely trim it quite close to the stitching – about 1cm away. If you want to make your sample into a pin cushion, you will need a piece of upholstery weight fabric for the back, or even better, experiment with a different design on the other side. If you’re tempted to have a go, share your makes on Instagram #simyschallenge.

One thought on “Needlepoint Tutorial”