At the end of my previous post I suggested knitting or crocheting a gauge swatch (or a tension square, whatever you prefer to call it) with your Scrumptious yarn. Not only to check that your cushion front and back will end up the right size; this little piece of fabric is ideal for practising our surface embroidery stitches (more on that tomorrow). This post covers blocking swatches and what to do if you’re gauge is a bit off.
Did you get to gauge?
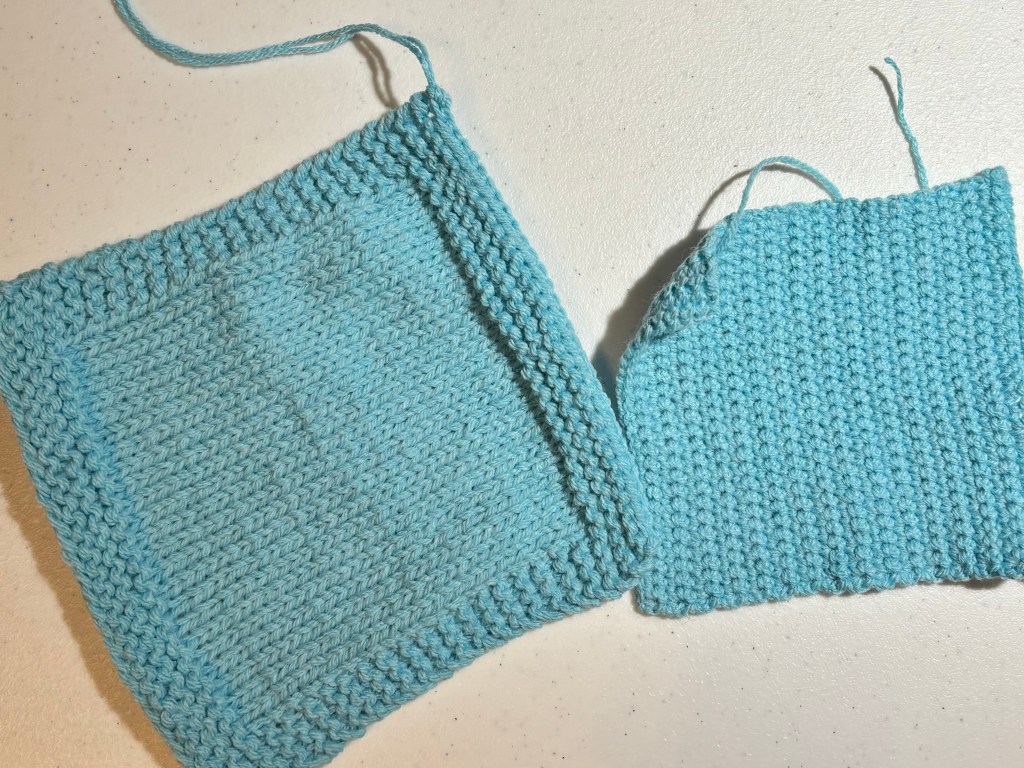
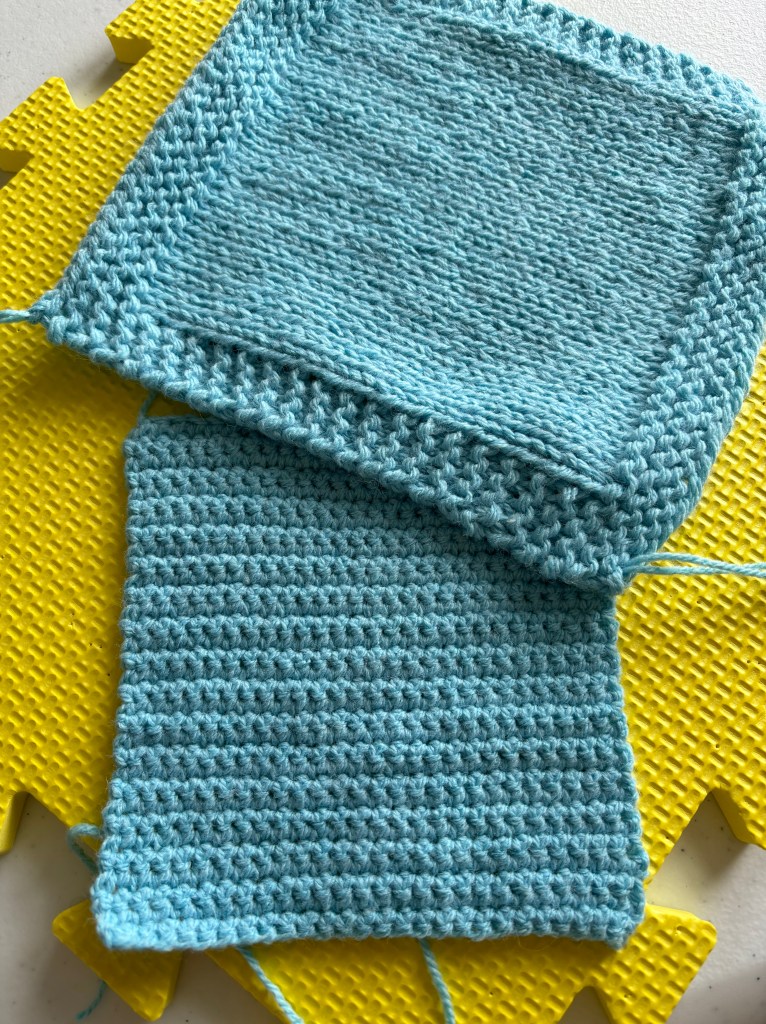
In the last post I mentioned that all sorts of things can affect our tension, and sure enough, when I knitted and crocheted swatches yesterday, for whatever reason, mine was a not the same as it was last time.
Knitting
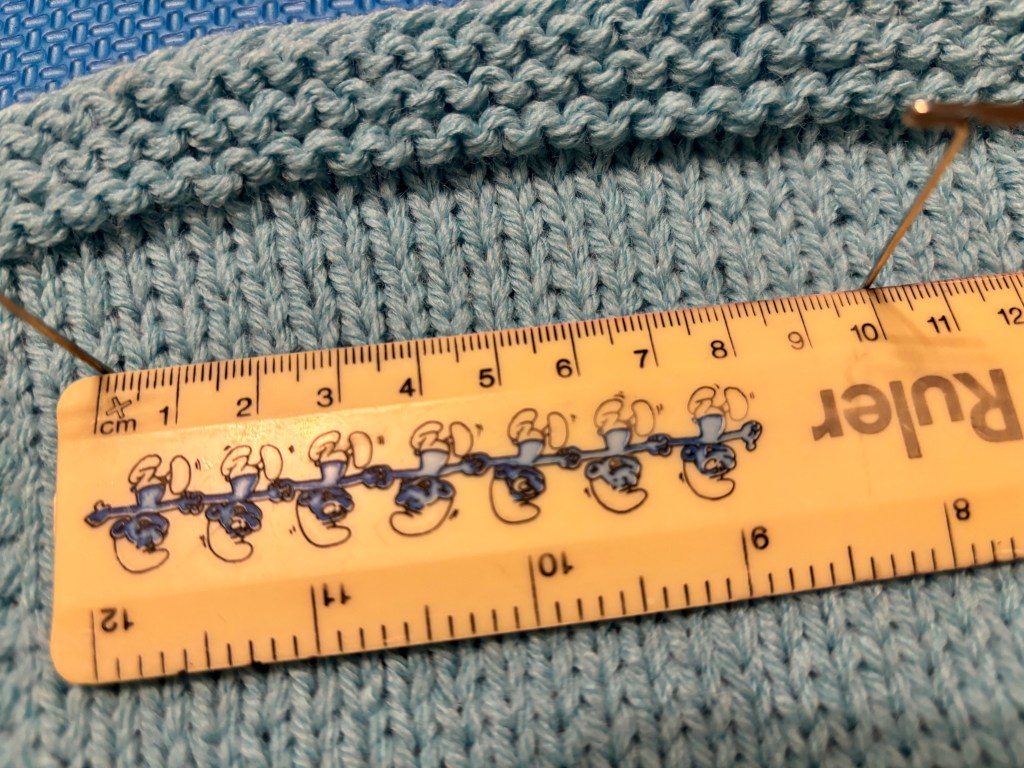
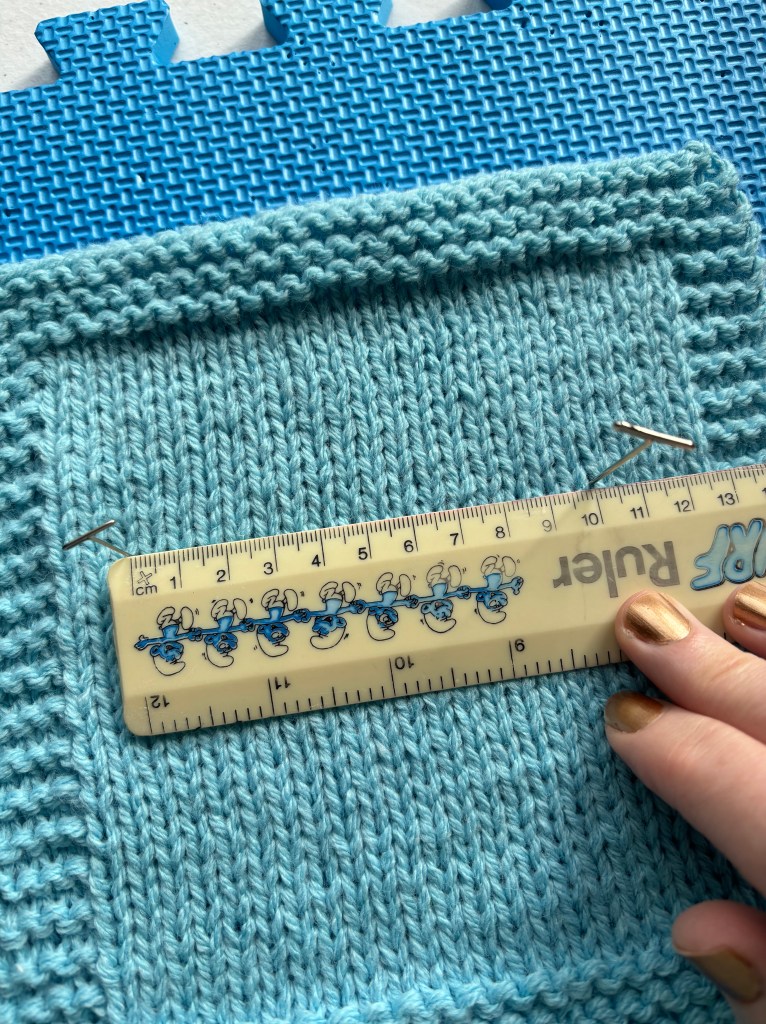
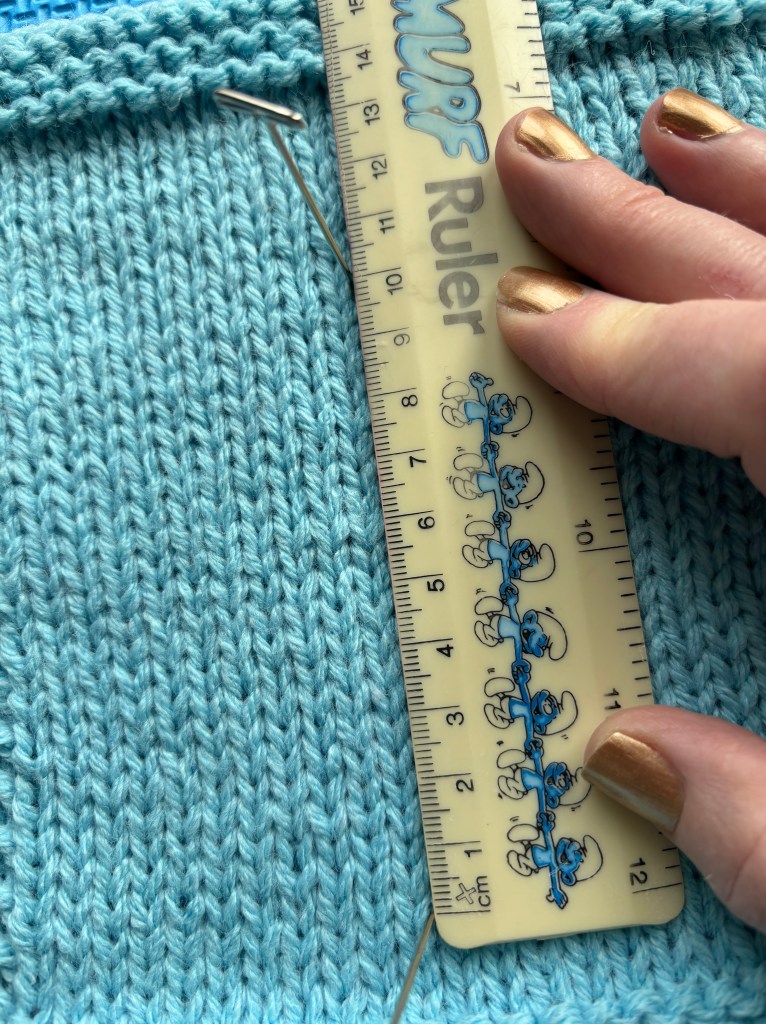
For knitting, the pattern asks for 16 stitches and 22 rows to 10 x 10cm using 5mm needles over stocking stitch with the yarn held double. Before blocking I had 17 stitches and 24 rows. I was happy with this as I know the knitted fabric will stretch a fair bit in both directions when blocked. If you have less than 16 stitches, you may need to go down a needle size.
Crochet
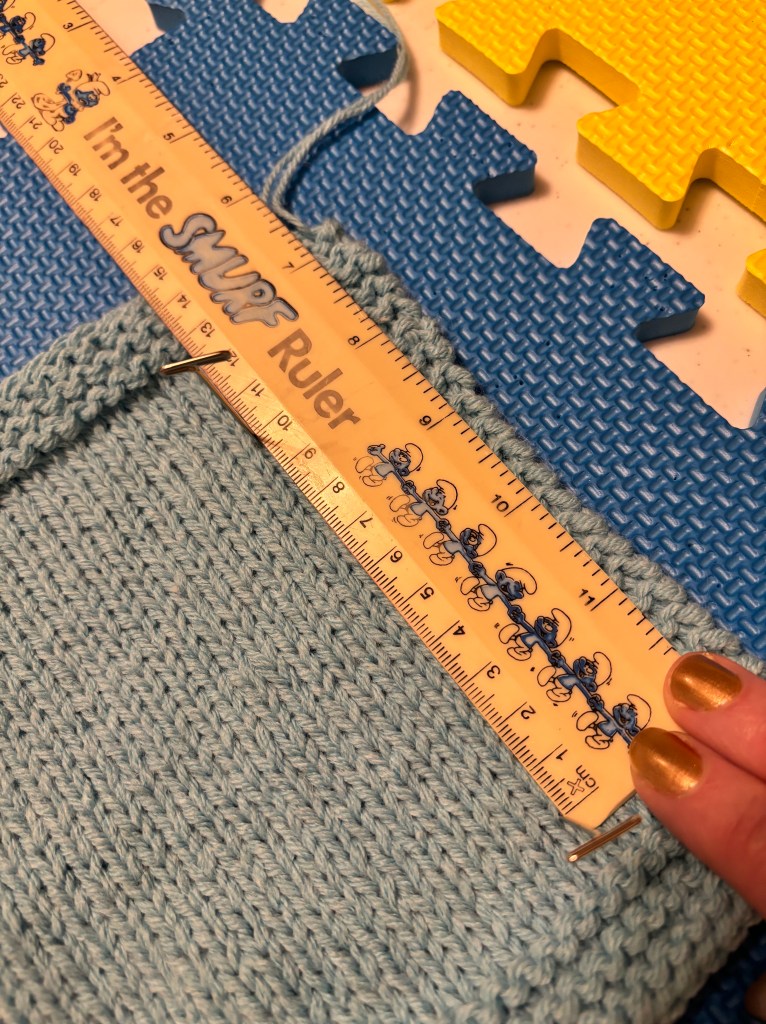
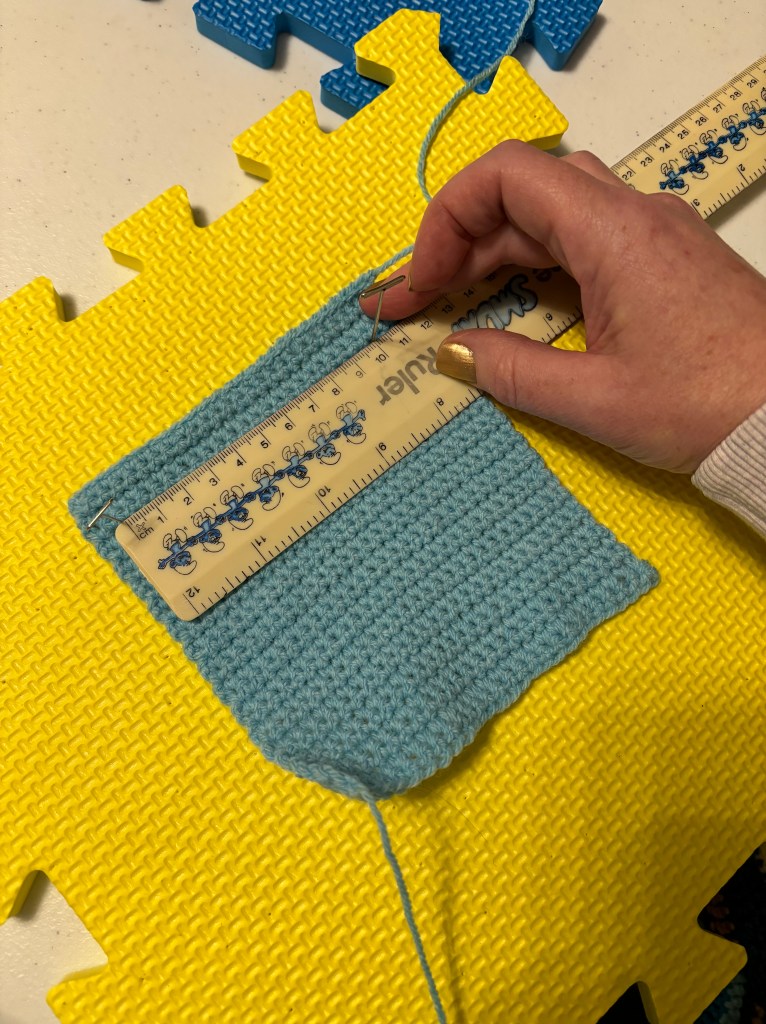
For crochet, we are aiming for 21 stitches and 26 rows to 10 x 10cm using a 4mm hook. My stitches were spot on at 21, but I had 24 rows, meaning that if I keep this tension I’m going to end up with an end up with a slightly rectangular cushion. Of course I could join #TeamWingIt, knowing that I’m using more yarn than intended and accepting that my bird will be slightly taller and skinner and the finished cushion might not look as satisfyingly plump. Fair enough, but this also means a small possibility of running out of yarn. Changing hook size is ok for altering width but not the answer for reducing stitch height. Fortunately there is a solution.
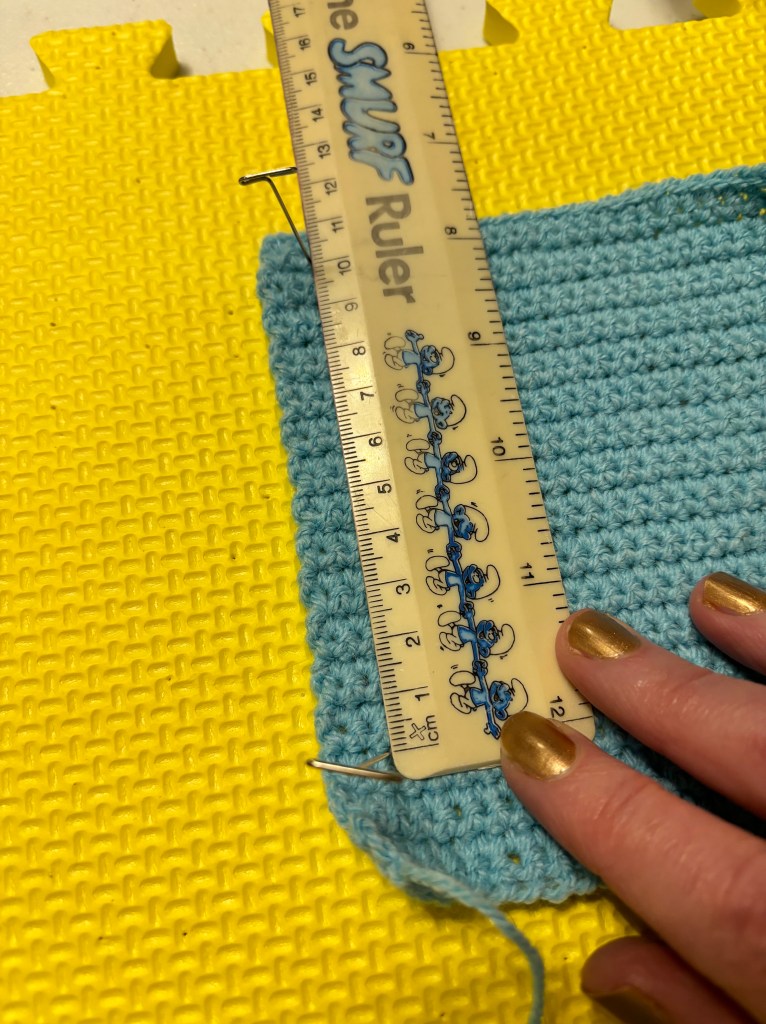

When I blocked the swatch, I pinned the fabric out and kind of compressed the stitch height and got to gauge. That’s ok but ideally I’d prefer to crochet closer to it in the first place.
If you took part in Scheepjes Colour Lab CAL in 2023, you might remember the discussions in the Facebook Groups about gauge, the golden loop and discovering whether you are a yanker, a rider, or a lifter (oo-er!). Esther from It’s All in A Nutshell Crochet blog, is the fount of all crochet knowledge. She made the very helpful video below and explains it beautifully, so thankfully I don’t have to!
‘A “yanker” pulls the working yarn back after every stitch, making really tight and short stitches. A “rider” has the hook right on top of the working level and is usually reasonably on gauge. A “lifter” pulls the working loop up high after every yarn-over, making longer than average stitches.’
So, I am likely a ‘lifter’, making longer than average stitches. Knowing this means I can correct my stitch height by not lifting my working loop quite so high.
Before blocking, I also noticed that my first couple of rows looked a bit ‘frilly’, so to get my edges parallel, I could do with making my foundation chain a wee bit tighter. Or I could chain with a smaller hook, before switching to the 4mm. Often crocheters have the opposite problem with a chain that is too tight. If this happens to you, try making your chain with a bigger hook.

Blocking
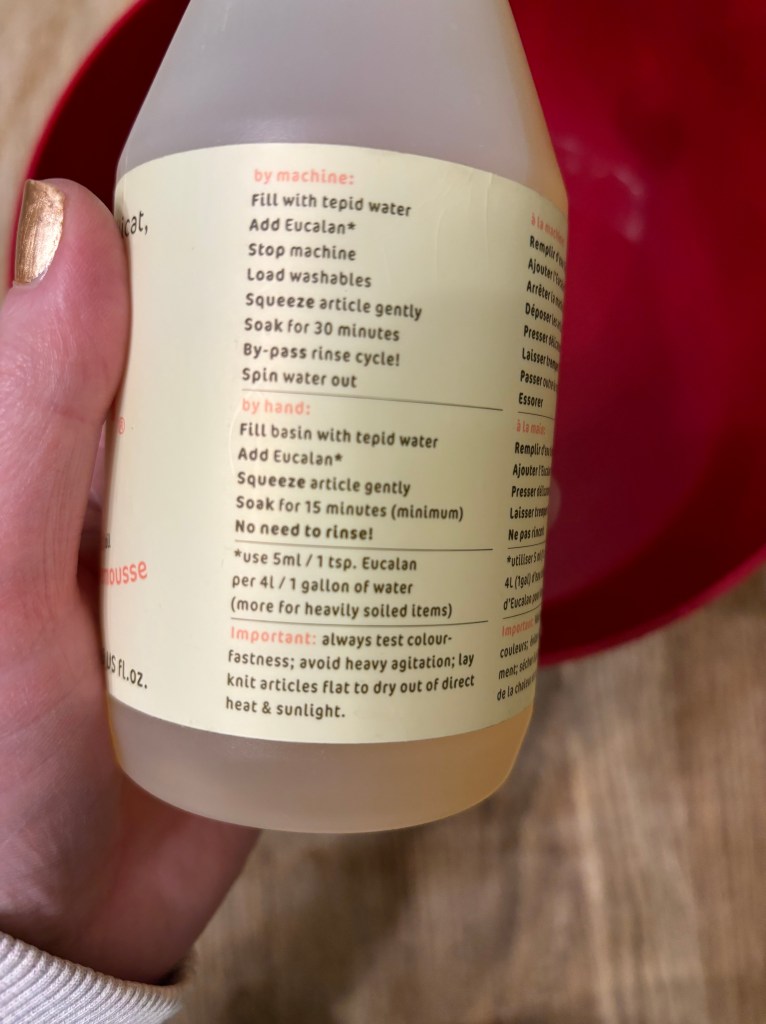
Generally I wet block everything I knit or crochet. Mainly because I love the smell of Eucalan! I soak the fabric in a bowl of tepid water with a capful of it (water on its own is perfectly fine) for 15 minutes, then put it in a towel and gently roll to squeeze out the excess water. There is no need to rinse. You won’t need much of a roll as Scrumptious it is a very easy yarn to care for that dries impressively quickly. Then I pin the piece out to measurements and let it dry completely.

When I was stitching onto my cushions, I really enjoyed getting a whiff of that fresh citrus smell (I like the Grapefruit fragrance) every now and again. Another advantage of blocking is that it will even out the stitches nicely ready for stitching into. So hopefully this information will cover any gauge issues you might come across. I’ll be back tomorrow as promised with a post on how to make the embroidery stitches.

Sorry, but a little confusion here. On the previous instructions, we were to do a 28 st fdt chain? But there is no way it fits to 10 cm (4″ US)? What did I do wrong? P.S. I actually rarely use a gauge test. Just not patient enuf I guess!
LikeLike
Sorry for the late reply – I need to change my settings to notify me of comments! I presume after this time you got it all sorted already or got your answer from the videos or in the Facebook groups? For a tension square you always chain (or cast on for knitting) a few more stitches than you need for a 10cm and work a few more rows. This makes it easier to lay the piece flat and accurately measure the number of stitches to 10cm without including the slightly distorted stitches around the edge
LikeLike