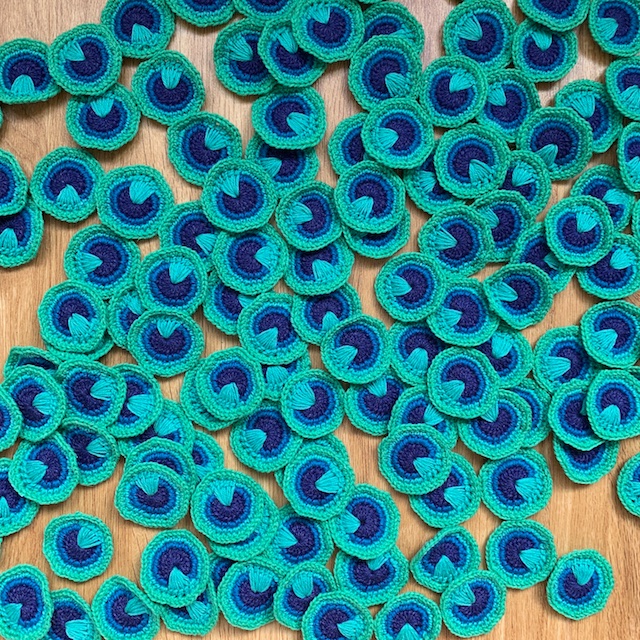
Hooking 142 motifs together on my most epic crochet project to date, I looked up and noticed the word of the day on my screensaver was ‘concatenation’. I’d not heard that before. Apparently it’s the operation of linking a series of things together end-to-end. ‘Just what I’m doing’, I thought, feeling smugly educated. But then we all know that crochet is good for the mind!
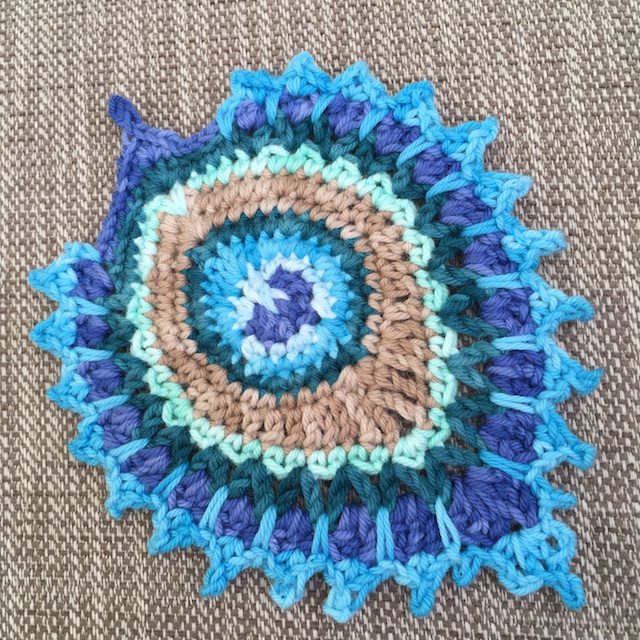
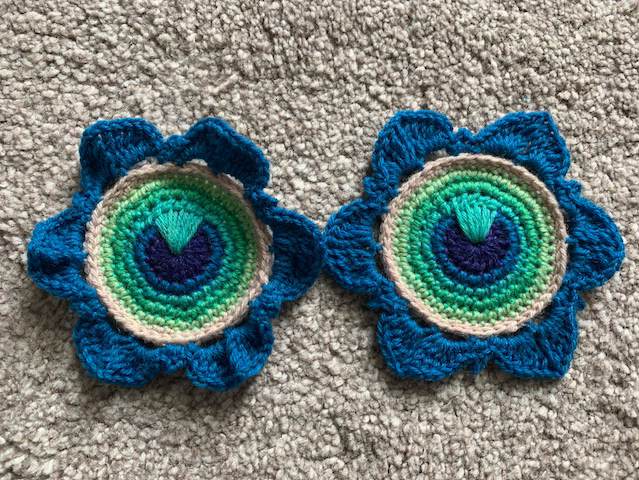
I was testing the Flowering Peacock Feather pattern in a new yarn for Christa Veenstra, the talented designer behind TheCurioCraftsRoom, known for her stunning peacock inspired crochet. I’d already made her ‘Nemali’ motif below. You can make this either as a single stash-busting coaster, or hook up several to string (concatenate!) together to make a garland, as I intend to. Christa’s patterns do involve a little counting but they are so very clear and well-explained.
While I waited for my yarn to arrive, I practised the Flowering Peacock pattern. There’s various methods of starting and finishing rounds. I worked a magic ring in the centre and found that starting rounds with a standing stitch and closing with a needle join worked for me. (The pattern includes links to YouTube videos if you need more help with this.)
It was good to have a go at the spike stitches before starting the throw. My tension was a little off to begin with.
Then a practise of join-as-you-go, getting my head around which points are joined to which and considering which way around the ‘eyes’ shound point.
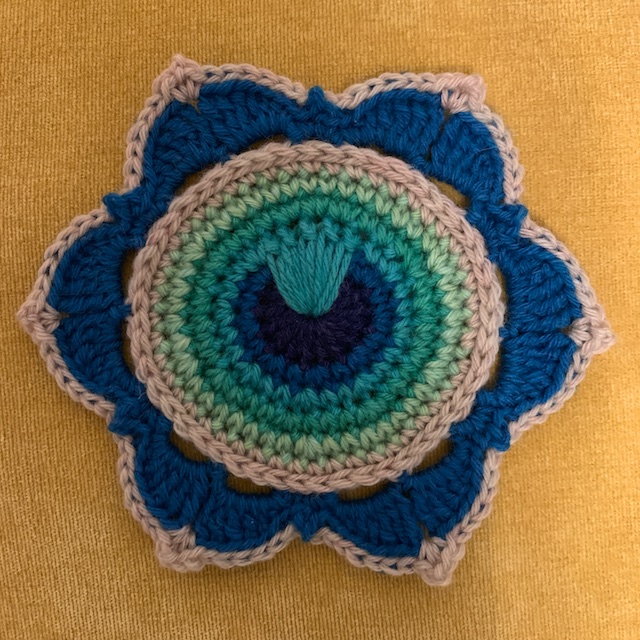
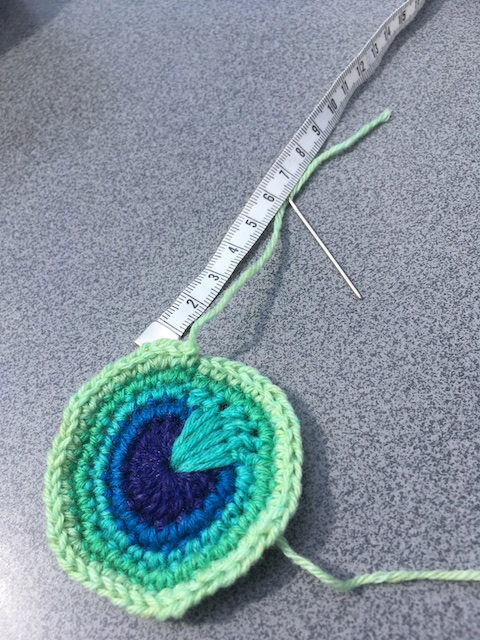
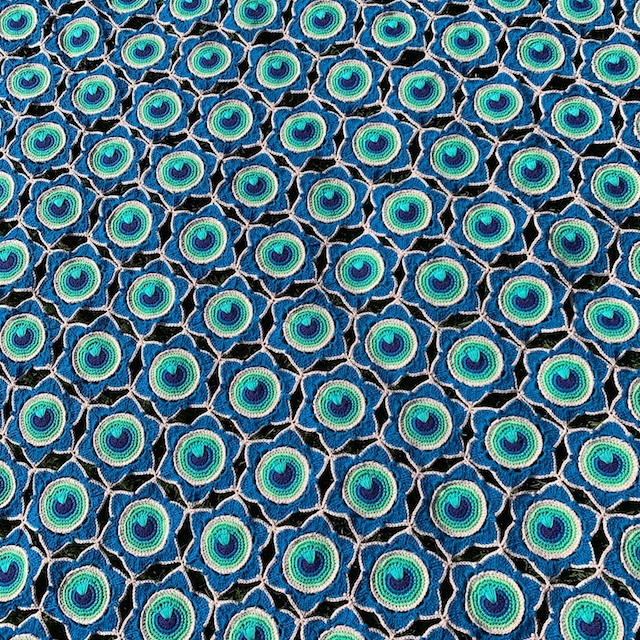
By the time the postie delivered the very exciting yarn parcel, I’d got the hang of the pattern and was raring to go. Below is how a single motif hooks up in the Scheepjes Metropolis yarn. It’s a lovely light 75% merino sock yarn. It’s very soft, not at all itchy and safe to put in the washer and dryer. That definitely sells it for me! I rather like how these shades look on the gold background.
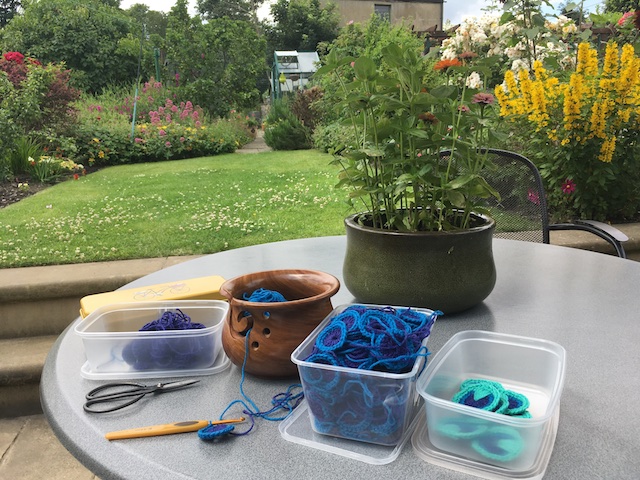
Only another 141 to do then! To get a consistent tension, I’d decided that I would tackle this methodically, round-by-round, rather than one motif at a time. This also makes the process quicker as the pattern sticks in your head once you’ve done a couple.
Some rounds were fine to do in front of a box set while others required a little more attention. I got through a fair few audio books! Sometimes it was nice just to sit quietly and enjoy the sound of the bees while I contentedly hooked away in my happy place.
Round three was soon complete.

Round four was my favourite! Is it sad to have a favourite round?
My ends were roughly 12cm and where I could, I crocheted over them to save sewing in, trimming as I went along.
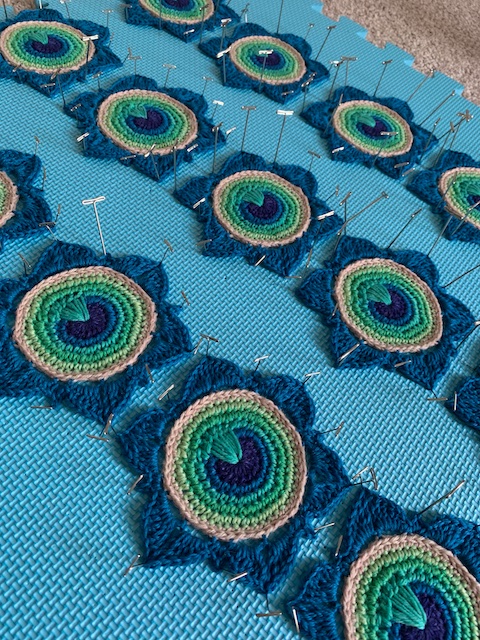
The really good news is that the motifs are hooked together after round nine so there’s no sewing up! Each evening I blocked the motifs I’d completed that day. By the next they were nice and flat and the boards freed up for the next batch. Below you can see the difference between an unblocked motif on the left and the blocked one on the right.
Plenty of pins needed!
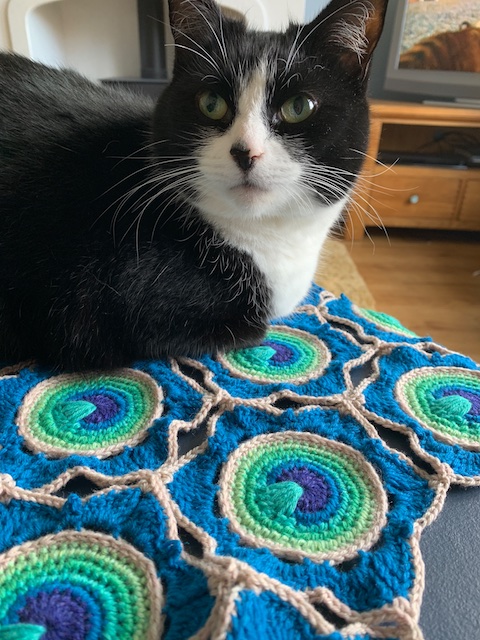
She looks a little annoyed. Maybe she was planning on sleeping on this spot!
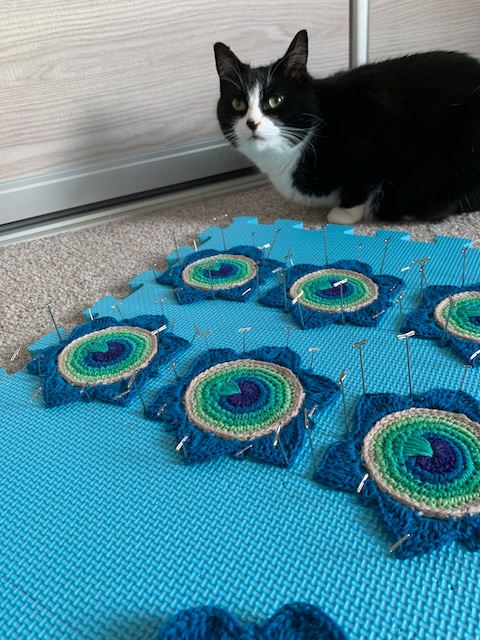
Not helping.
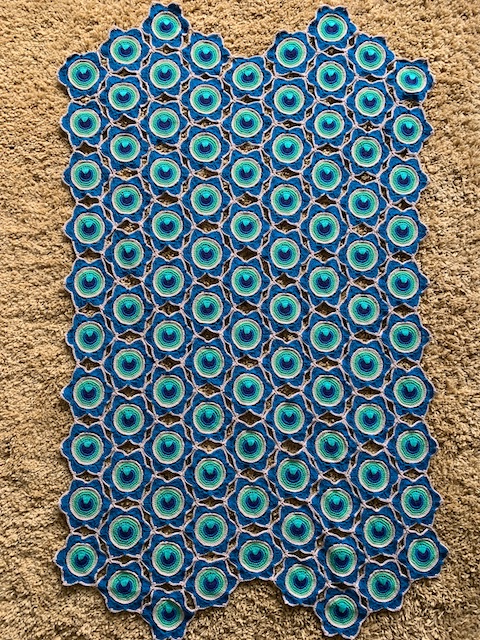
Getting quite big now.

I hooked it together in vertical rows, top to bottom. This was with four rows left to go.
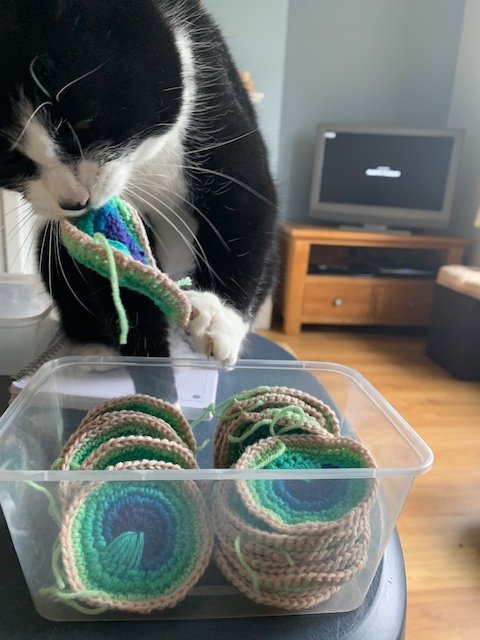
Waaahhh! I thought I was about to finish but I was one motif short. I’m sure I counted 142. How did this happen??????
Hmmmm, maybe something to do with this furry thief?
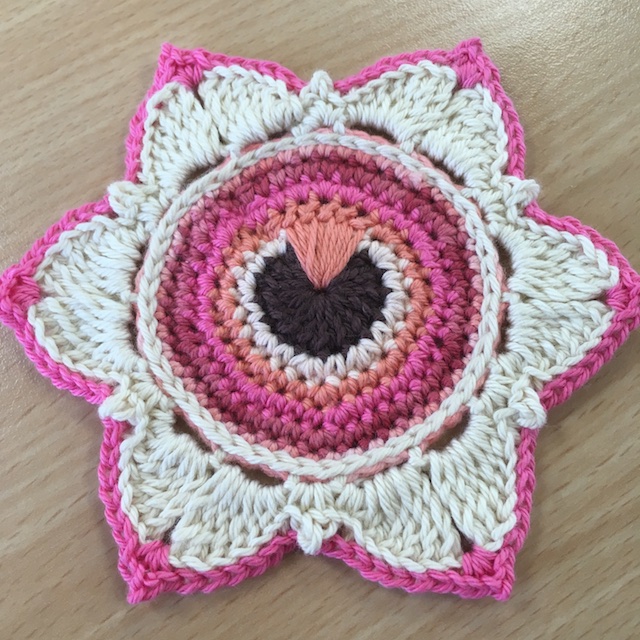
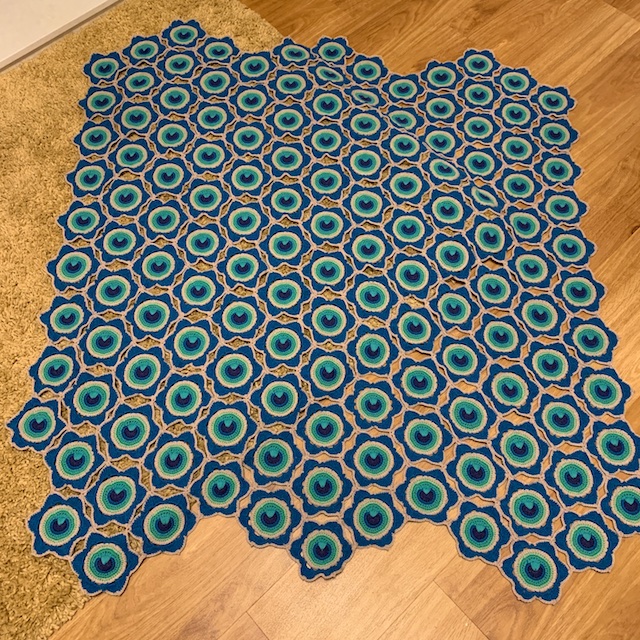
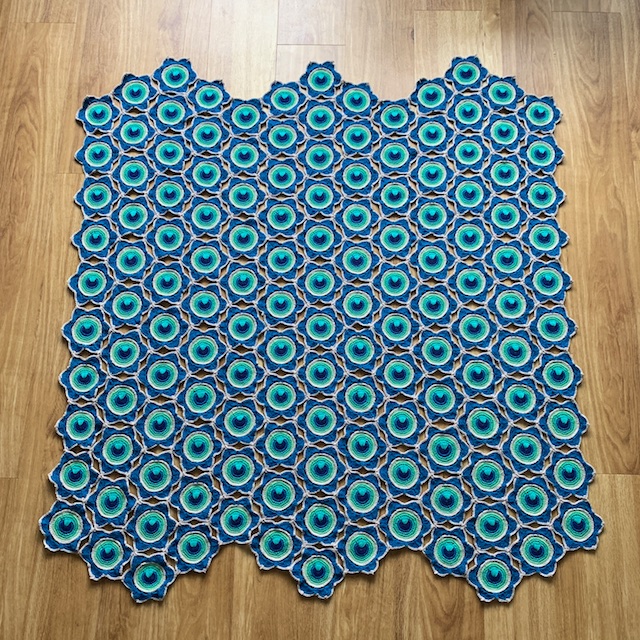
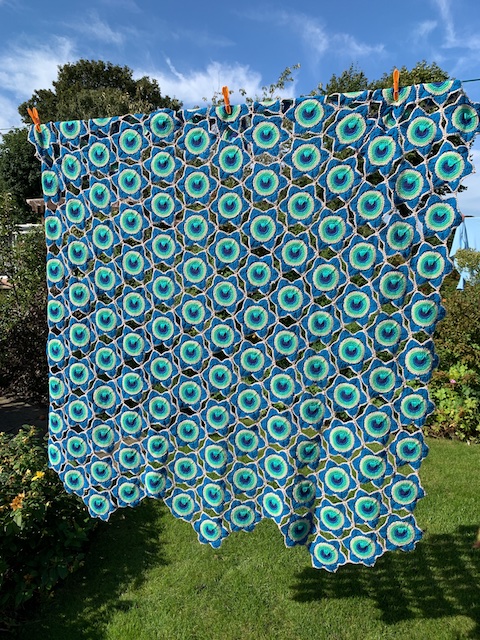
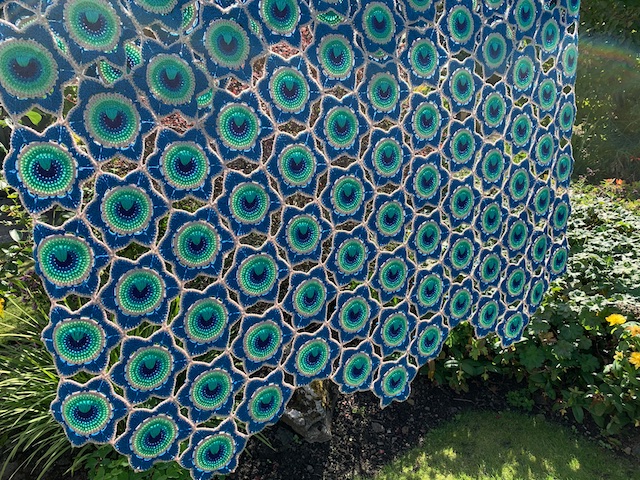
Ok, it could be worse. At least I didn’t find I’d put one in upside down in the middle! I hooked up another (I’m quick now!) and we’re all done. Do you like the undulating edge? There’s so many ways you could configure the motifs. It makes this such a versatile pattern.
After round 10 your work might look a little lumpy again as you’ll have changed direction at lot. A further final blocking sorts this out to give a more professional finish
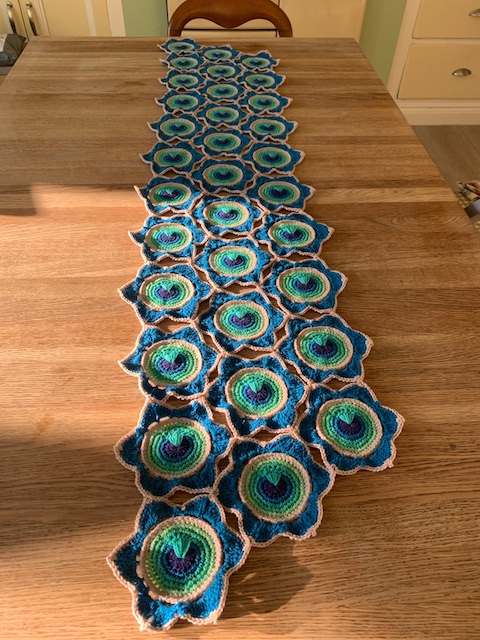
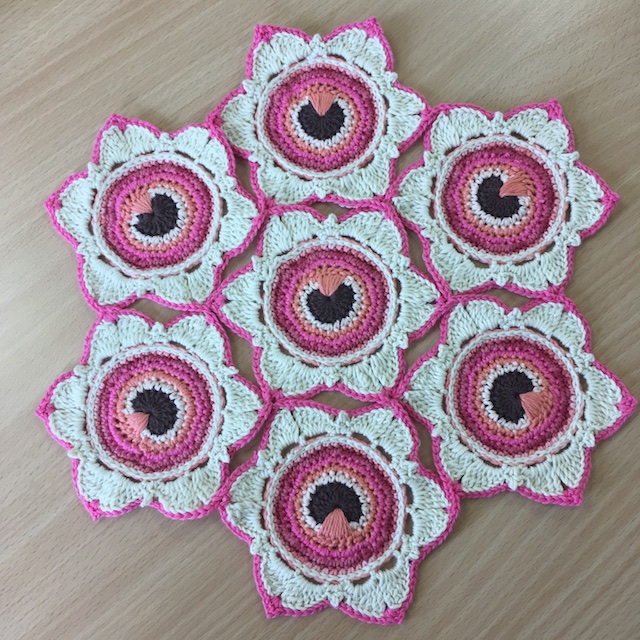
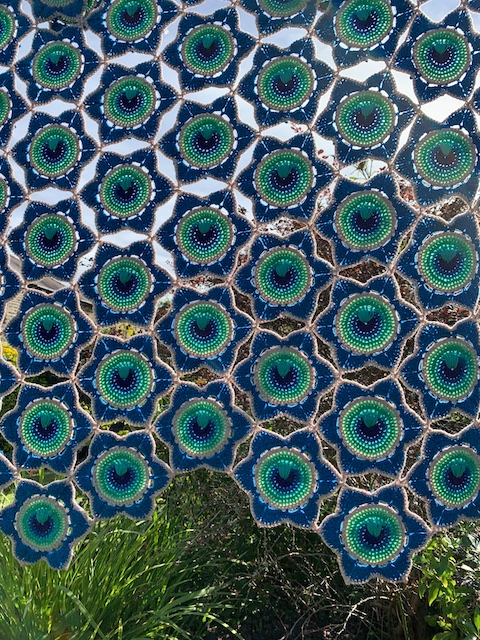
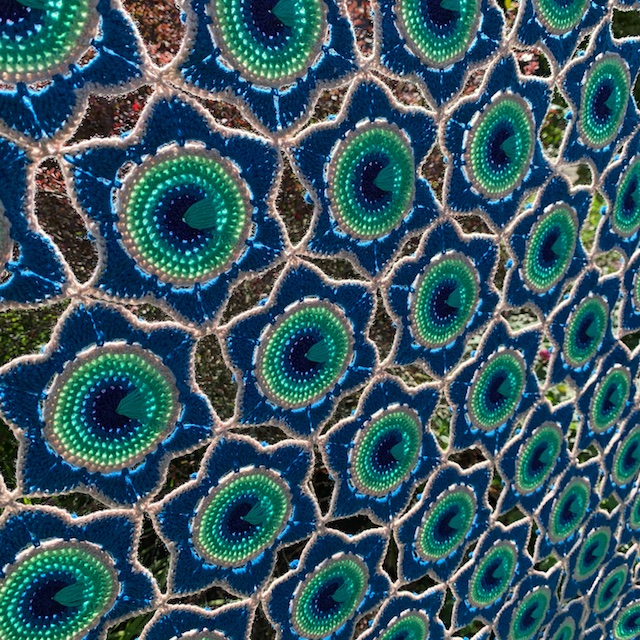
I really like this view. It looks like flowering peacock feathers go on forever. Pink background works nicely too.
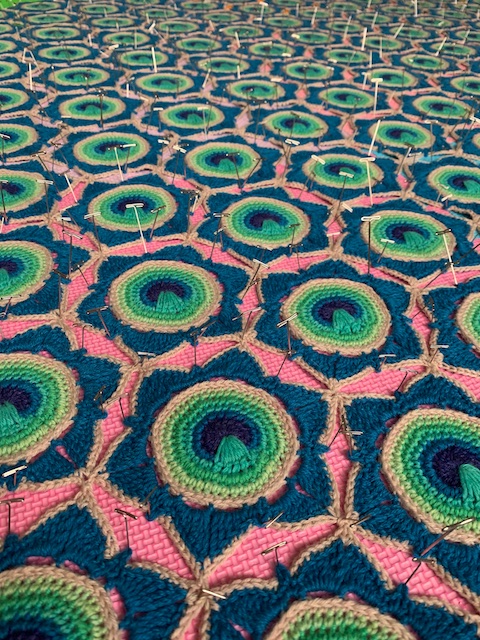
After all that bending over pinning on the floor, then you have to try to stand up, haha. In hindsight I’d recommend blocking on a table top if yours is big enough. I enlisted help to pull the pins out again whilst running a Radox bath.
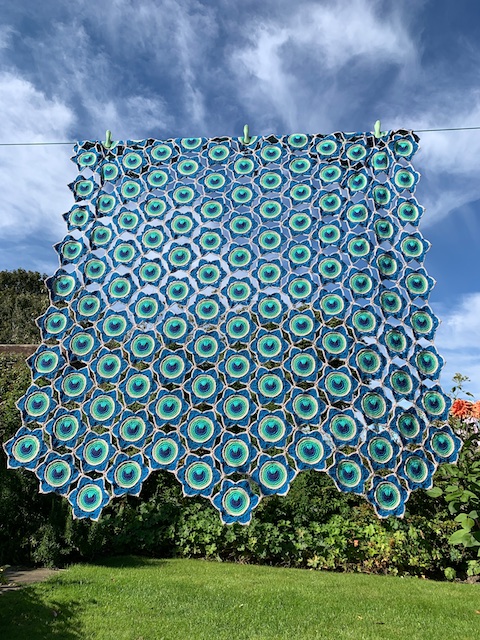
Then you can sit back and admire your handiwork. I love the spaces between the shapes. Everything I’ve made before has been solid but with this you can alter the look by changing the surface behind.


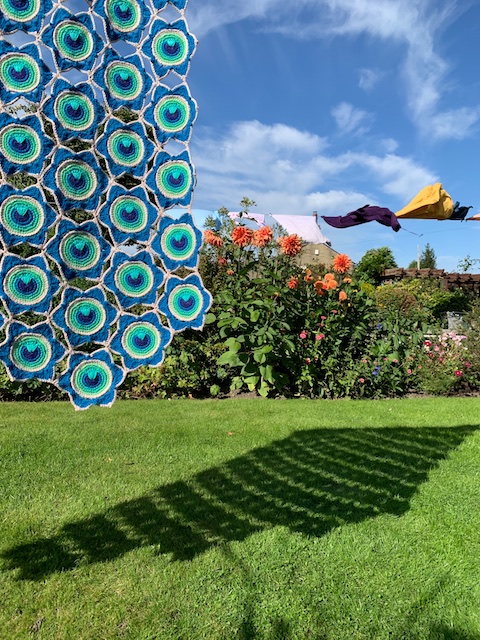
Pretty cool shadows too.
This is the back which still looks pretty neat.
I spent ages that day just looking at it and the patterns it created. I love it!
A big thankyou to Christa for trusting me to make up this lovely design. The pattern has been released today and you can find it here on Etsy or on Ravelry. You can also join The Curio Crafts Room Community Facebook group to see more photographs of Christa’s designs and more images of the Flowering Peacock Feather throw.

Lovely photos! I do enjoy a project myself that uses the ‘production line technique’ 🤣
LikeLike
Thanks Anita – yes methodical definitely works if you’re going large on Flowering Peacocks! 🦚🦚🦚🦚🦚
LikeLike