Compared to teeny, tiny Octopals, my next project was supersized! Yes it involved learning tapestry crochet, a new-to-me technique and investing many hours, but the pattern was so well-written and the yarn delightful so hooking the Marguerite blanket was an absolute pleasure.
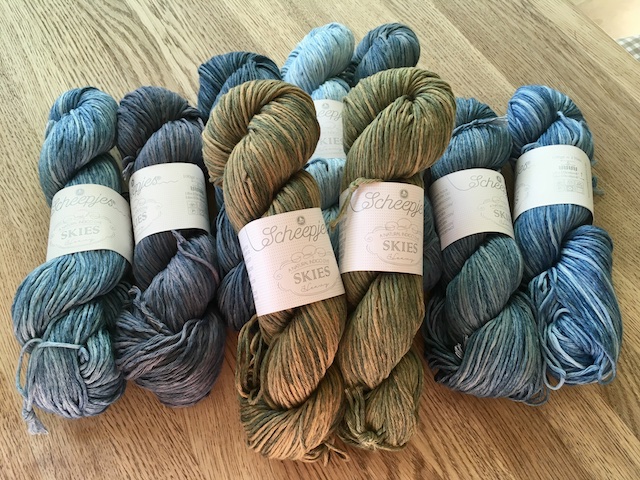
Sandra Eng of MobiusGirl Design released the pattern as a crochet-a-long (CAL) running from January to April this year. Meanwhile Scheepjes were launching my yarn choice, Skies. It’s a drapey cotton yarn in shades of denim blue and green and being an Aran weight, my blanket grew satisfyingly quickly.
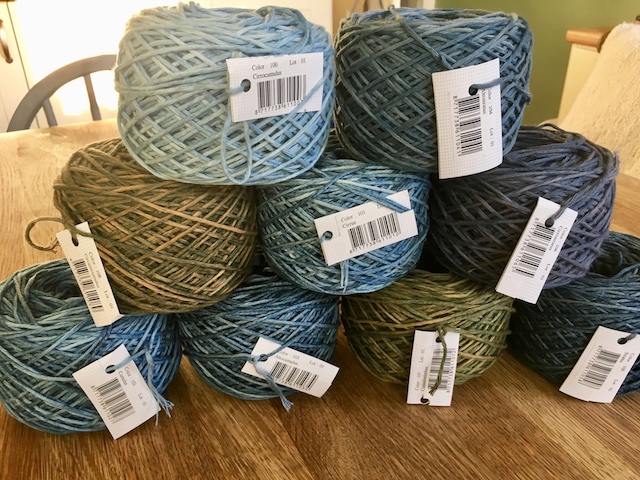
Skies is sold in 100g hanks that allow you to see the subtle variations of each shade. My first job was transforming hanks into cakes to prevent tangles. My KnitPro wool winder does the job really well. Scheepjes have just brought out a really beautiful beechwood ball winder. How great that we are beginning to see a return to natural materials and long-lasting quality in crafting accessories!
For winding, you’ll also need a patient volunteer with very strong arms, or ideally, a swift. This will save SO much time – an investment you’ll never regret. I love my beechwood and rosewood umbrella swift. The base makes it easy to perfectly position and it’s stable enough to stay put on the table, even when winding at top speed!
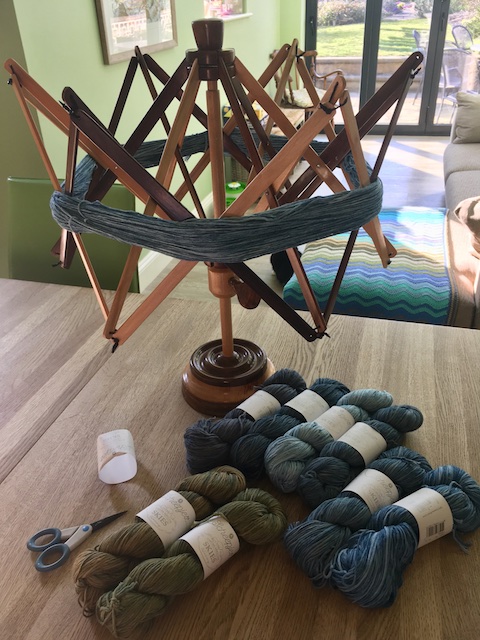
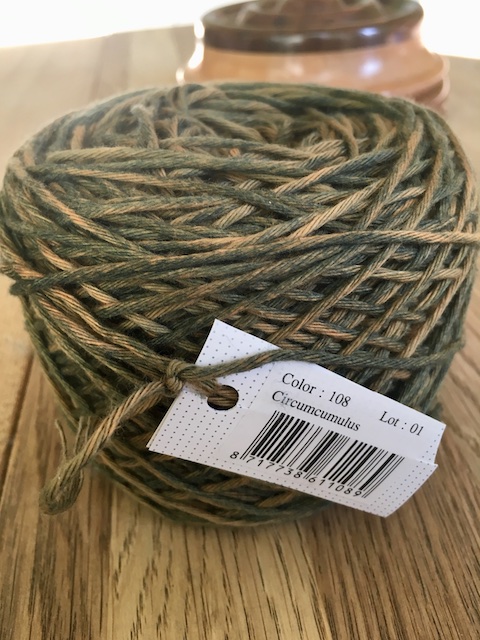
I cut out and attached a section of the label to the cakes so I could record my colours. I used every shade in the current range as some at first appear similar until you get to know them.
All shades are named after cloud formations – terms I last heard in high school geography!
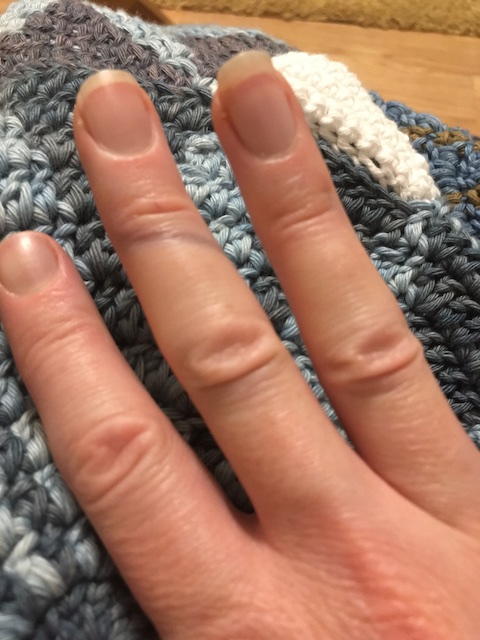
When you’re working with the darker shades for a long time, you might notice a little dye on your fingers. This isn’t a flaw but a totally normal feature of indigo dyed yarns. It’s all to do with how indigo physically bonds to the fibre. When it’s manipulated, the last loose particles of dye are released. Don’t worry, it will easily wash off your hands or clothing but be aware that it could stain bamboo hooks and needles.
No such worries with my favourite Clover Soft Touch Hooks. With tapestry crochet, you’re switching between two shades, carrying the unused yarn along the top of your work, whilst crocheting over it. You may need to adjust your hook size to accommodate the extra bulk but you also don’t want the other shade to show through. I found a 5mm hook just right.
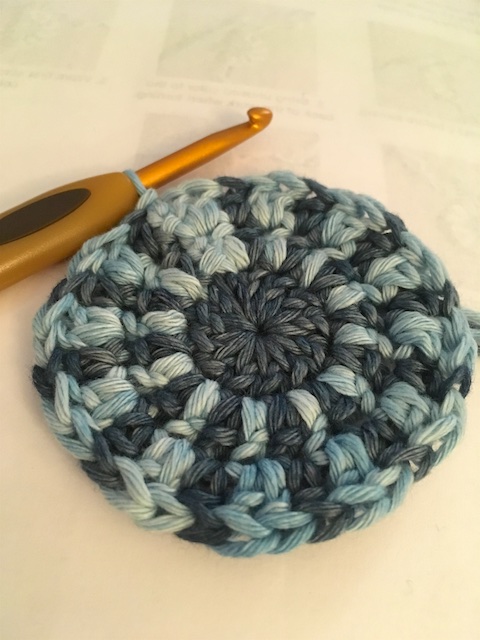
The first petal of every round will be slightly wider than the others but as you add more rounds it becomes less noticeable.
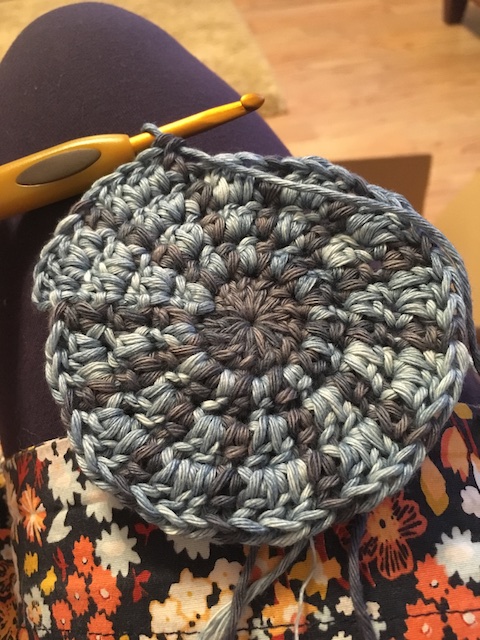
By the time you start joining the motifs together, you won’t spot the difference at all.
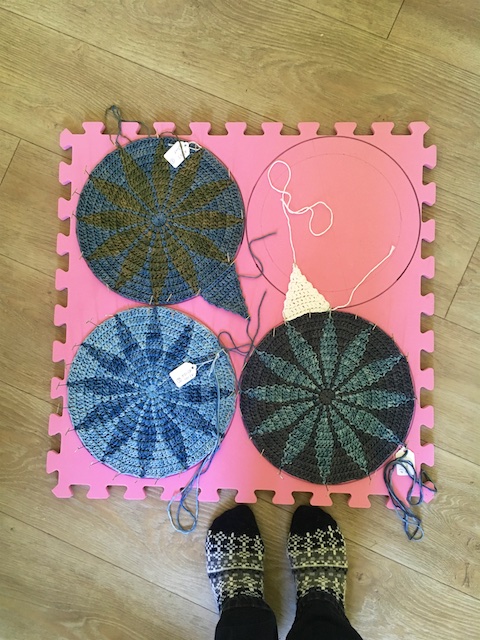
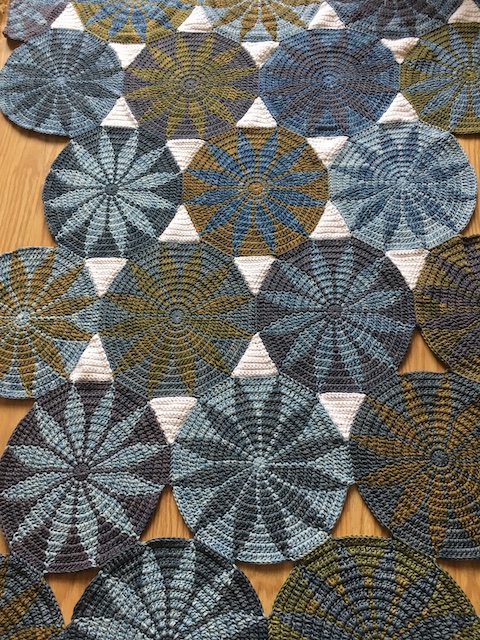
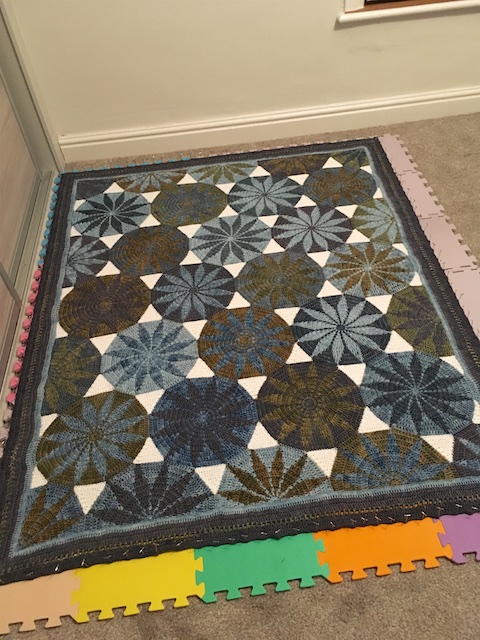
The Marguerite blanket is made up of motifs featuring a 12-petal daisy design. After the first few rounds, check you have the right number of petals. On my first attempt, I couldn’t work out why my circle was curling. Until I realised I only had ten!
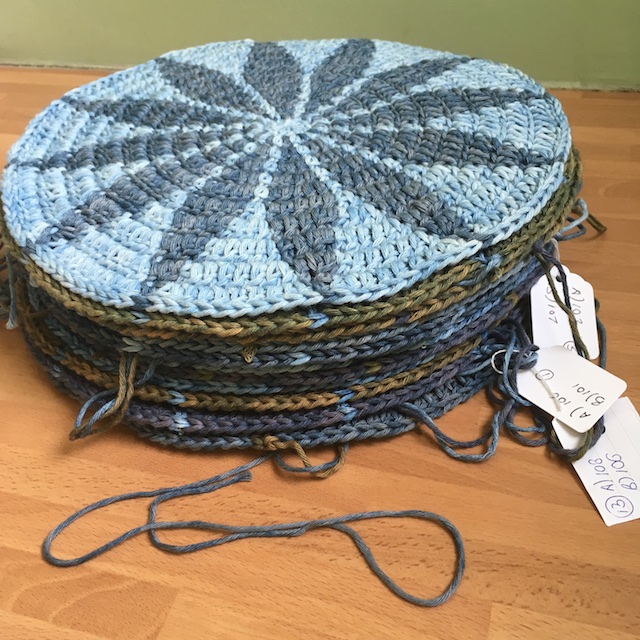
Once you’ve mastered the motif and completed the first couple, likelihood is you’ll remember the pattern without needing to refer to it. Then one motif every evening in front of the TV is perfectly doable. By pancake day I had this little stack!
The reverse looks pretty good too. Some of the CAL Facebook group prefer the back and are using it as the front. The group really is worth joining to have any questions answered and to see the tremendous variety of colours being chosen. The right variagated yarn on petals can look particularly stunning.
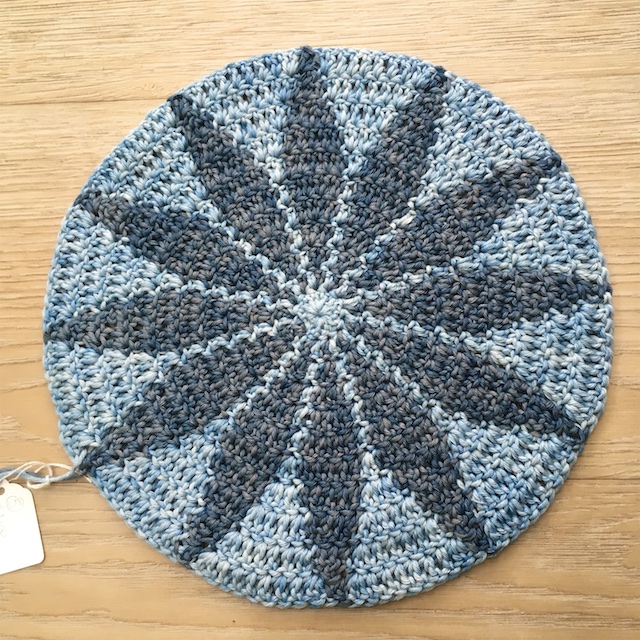
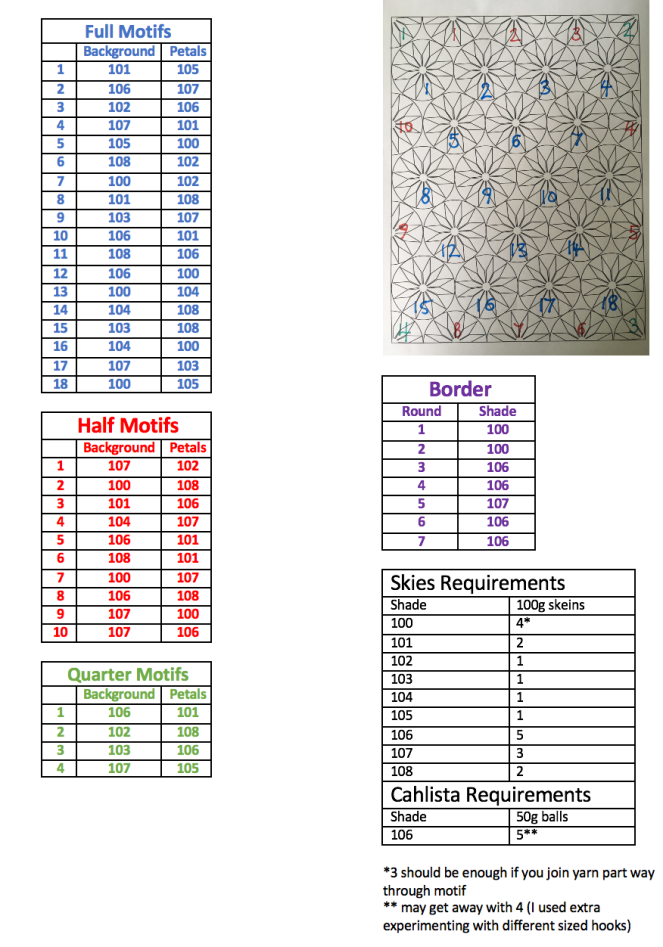
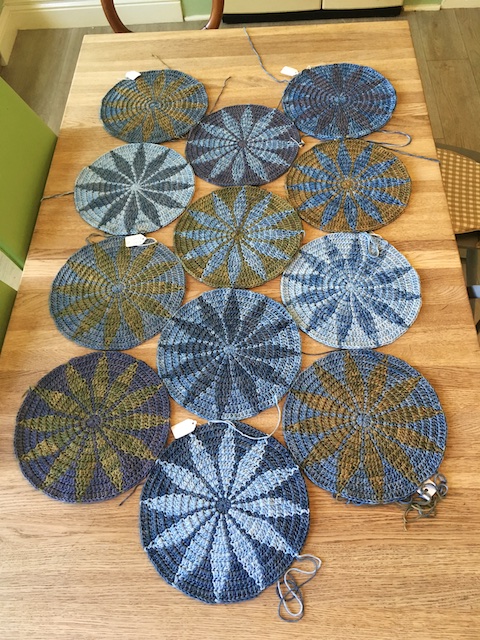
Each Skies motif measured around 28cm blocked. This made a finished blanket with borders measuring 180 x 130cm. For a full motif, allow 30g of each shade, 18g for half and 12g per quarter. Here’s my notes on shade placement and requirements:
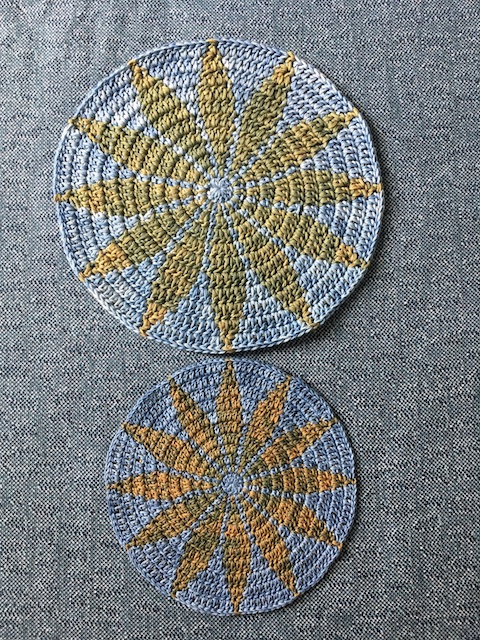
You can alter the blanket size by changing the number of motifs or rounds on the border. Or you could make a smaller blanket using Skies Light, the finer sport weight version. The photo below gives a comparison. Skies Light made a motif measuring 21cm diameter using a 2.75mm hook. The designer has a useful blanket size calculator on her blog. There’s also plenty of general information, tips, links to video tutorials and answers to FAQs here.
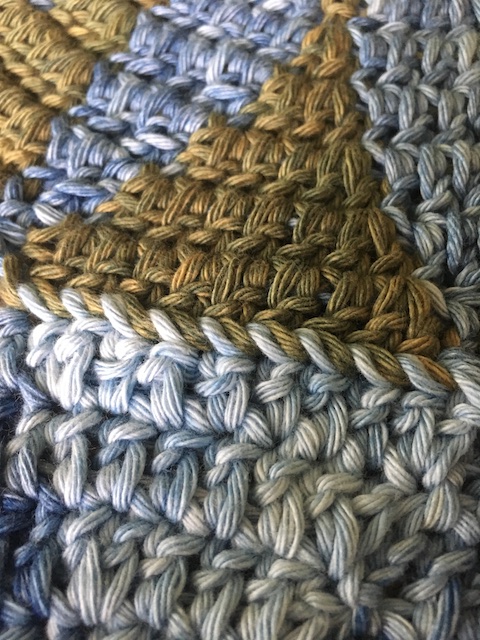
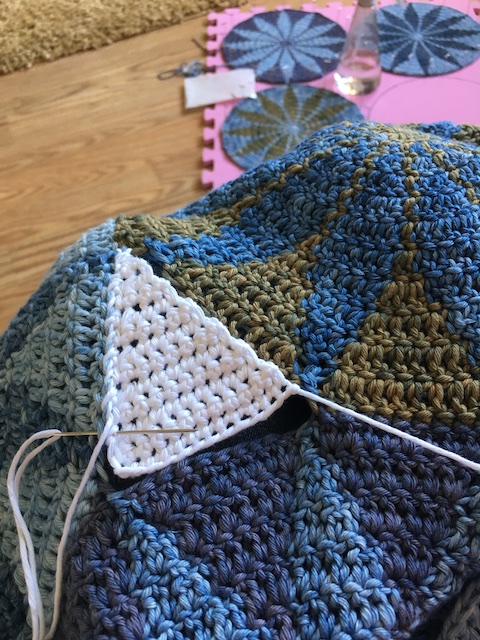
You can join the circles as you go but I made the full circles first as I wanted to block them first and play with the final colour placement.
I left long tails so I could pull the stitches back to the right place to join them. All the information on how to do it this is clearly included in the pattern. Below is how the joins will look – a little like a twisted rope.
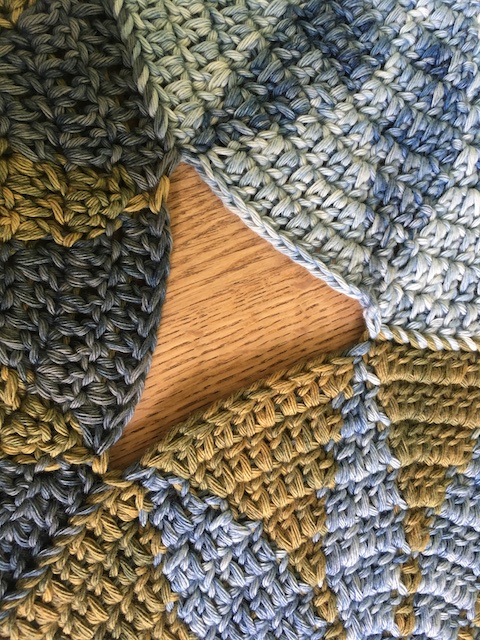
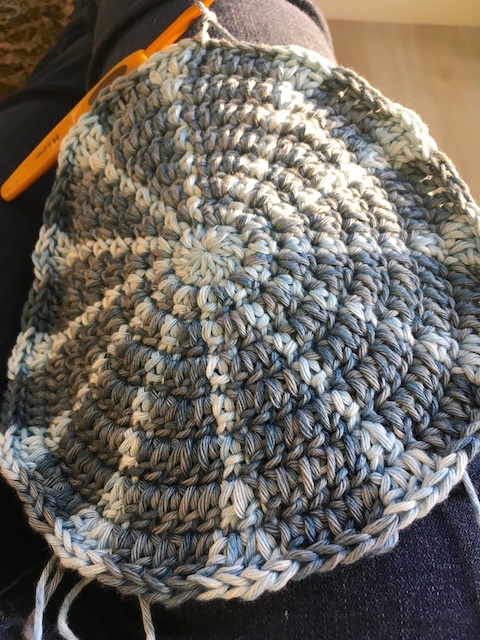
Next you crochet triangles to fill in the gaps. These are really quick and easy. Scheepjes Cahlista in white is what I used as it’s compatible and contrasts with Skies. I went down a hook size to a 4.5mm as this made the triangles lay nice and flat when they were joined.

Stitching them in is pretty simple but if you don’t like to sew, on the CAL Facebook page, some members have shared how they made versions of triangles that can be crocheted in.
I’m not going to lie, this part takes a while. My top tips are:
- sew central triangles first, working your way to the edges (leaves more space for your hands)
- make sure the lines on all your triangles face the same way (it just looks better)
- work on a table (blanket will be getting quite heavy by now and it’s less likely to distort your stitching)
- Make triangles and sew them in as you go along (to relieve boredom). Otherwise put on a box set
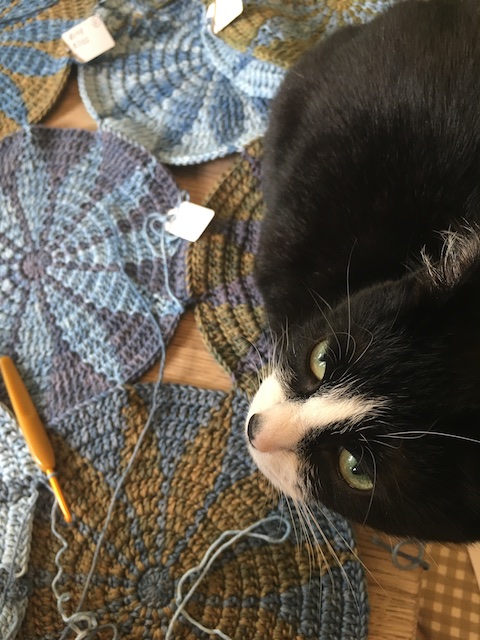
- evict the pets (not helping!)
A day or so later………ta-dah!
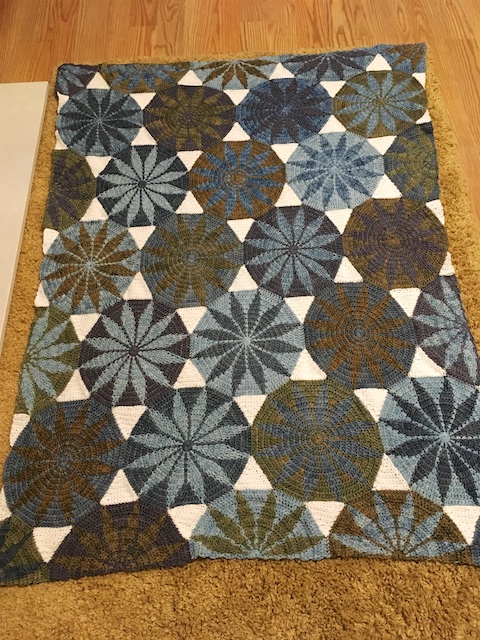
When it comes to the border, you will probably need to adjust your hook size again or it could start to look frilly. On round one I went up to a 5.5mm, then down to a 4.5mm for the remaining rounds.
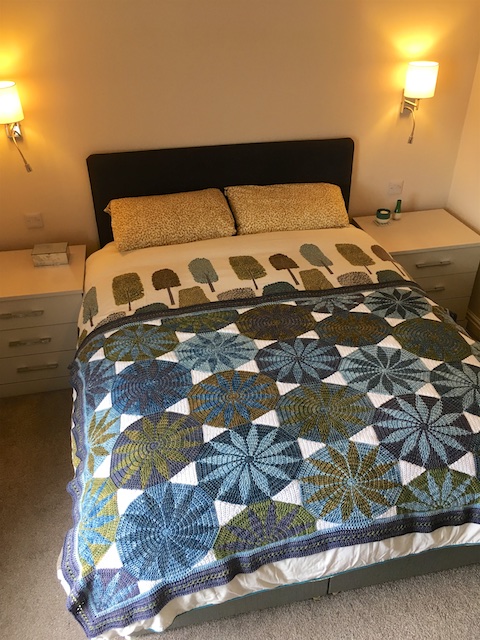
After finding the only spot in the house big enough for a good final blocking (thankfully no-one got up overnight and stood on the pins), my biggest crochet project to date was all done. I absolutely love how it looks with my bedding and am so chuffed with it. I’m feeling a strange combination of pride and relief that it’s finished but am also bereft now it’s done. How exciting though that I can start planning the next project!

It is absolutely stunning and worth all the hours and work you’ve put in to it. What a fantastic talent you have.
Lovely to see you again at Anne’s
Lynn x
LikeLike
Thanks Lynn. It was great to see you too and meet your lovely Mum. What a perfectly relaxing day it was!
LikeLike
I love the bedding, that has exactly the colours in it. Where did you get that?
LikeLike
This is such an informative post.. thankyou Liz.
I am still making my Marguerite and can’t wait to get back to it.
Yours turned out so beautifully. Hope you’re still enjoying it 😃
LikeLike
How are you getting on with your Marguerite? Would love to see photos when yours is finished!
LikeLike
Thank you, that’s kind of you to say Looking forward to seeing your version. It’s such a great design, I’d like to make another but it’s like going on holiday somewhere wonderful. You want to go back but there’s so many other places in the world still to see!
LikeLike
Is dit patroon ook in het nederlands?
LikeLike
Nee, sorry!
LikeLike